SAP Setup Information for Instructors
Some initial setup is required before term start to ensure SAP is ready for student use.
After you have completed the "Download and Install" and "How to Login" instructions for your respective type of computer, you need to complete the following setup.
Step 1
A week before term starts, the college will send you the individual user names and temporary password information for your class.
Each student will receive a unique user name and common temporary password. You must send the information via the Canvas inbox message to each student individually during the first week of the term.
Step 2
Post an announcement during the first week to let students know you have forwarded their personal login information. Include the college provided server name and client ID.
You may remind students to visit the download and login information located in this SAP Guide.
Step 3
Monitor any added students to the course during the Add/Drop period. Report any additions to the college using the Support contacts. After the college provides the user name and password to you, email the new student.
Important Note: Never give students your user name and password because they should not have instructor access to the SAP GUI.
How to Download and Install SAP for Instructors
Complete the steps below as soon as possible to ensure your course is ready to finish SAP setup.
Note: If you have previously installed the SAP GUI on your device you may need to reinstall or update. Follow the instructions below to be sure your version is up to date. While some verbiage may be slightly altered based on how much of the download and/or installation process you have completed, the steps should be the same.
Important Note: SAP requires you download and install a GUI. You must have administrative rights to install the software on your device.
Step 2
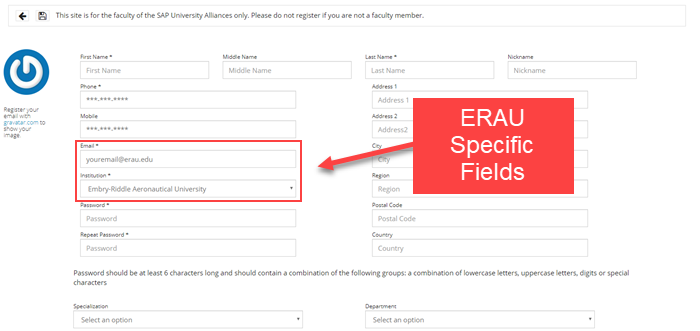
Enter your information in the registration form. Make sure you select Embry Riddle Aeronautical University from the Institution drop down menu. Use your @erau.edu email address.
Important Note: Once you complete the form, a request will come to the ERAU College of Business to activate your account. You will then receive an email from the college when your account is activated. You will not be able to login until you receive that email.
Step 3
Once you have received your activation email from the college, you can login using the user name and password you created.

Step 4
Select Support.

Step 5
Select Downloads.

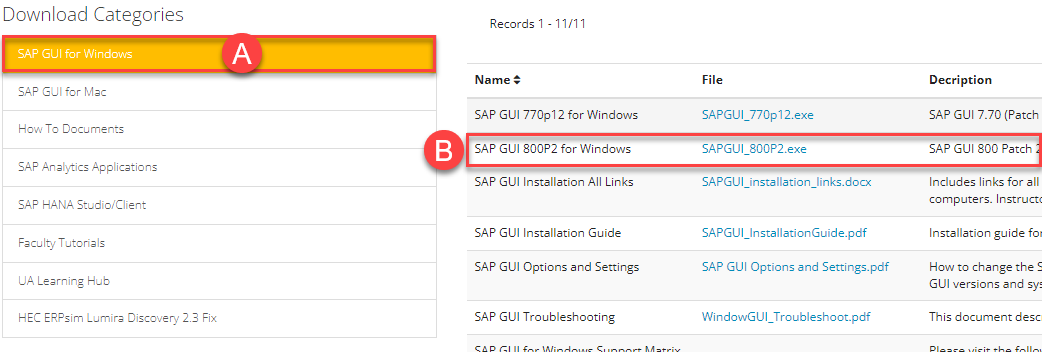
Step 6
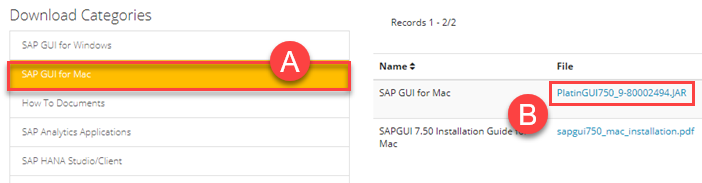
- Select SAP GUI for Windows.
- Select SAPGUI_800P2.exe to download the file.
Step 7
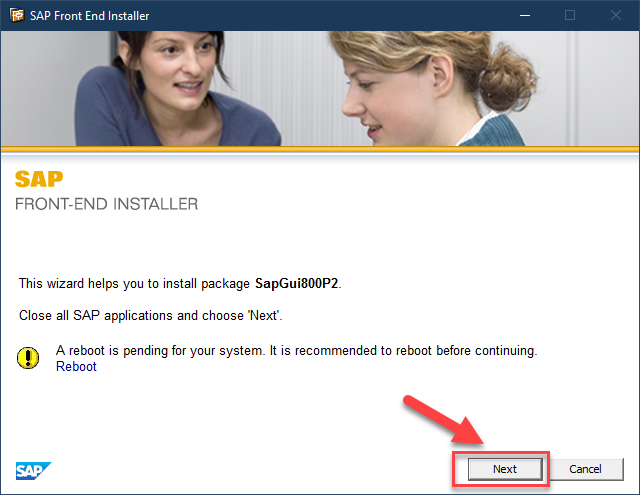
Open the downloaded file on your computer. A pop-up window will appear. Select Next.
Step 8
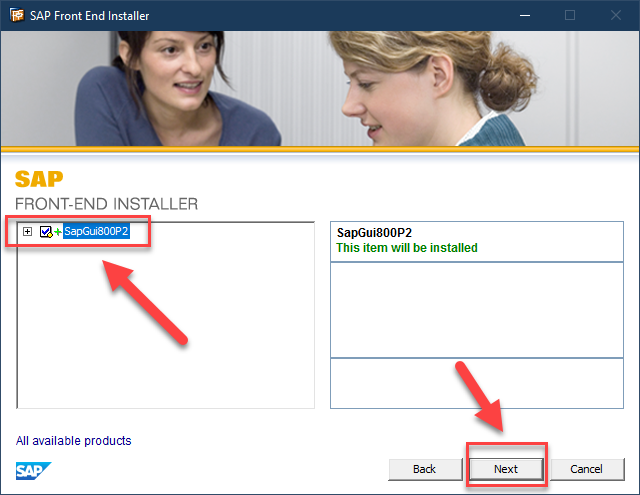
Select the GUI you are installing and select Next.
Step 9
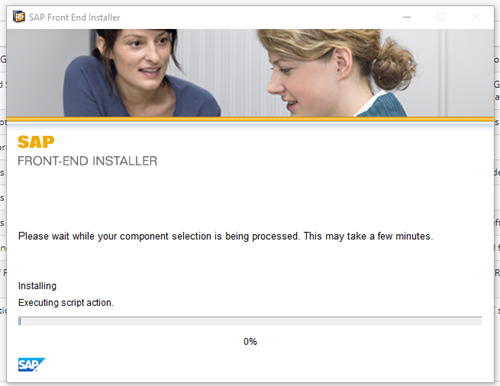
A installation progress screen will appear.
Step 10
Once it is complete, select Close and reboot your computer.
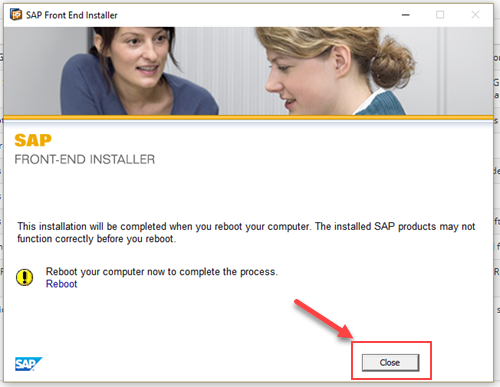
You are now ready to login and use the SAP GUI.
How to Login to SAP for Instructors
If your account has not been activated by the college, do not complete the directions below until they have emailed you.
You will receive the server name and client ID from the college during the first week of the term. You must have this information to follow the steps below. If you have not received it from the college, reach out to them ASAP using the Support contacts.
Steps 1 and 2 must be completed each time you login to SAP. Use all Steps when logging in for the first time.
Logging Into the Server
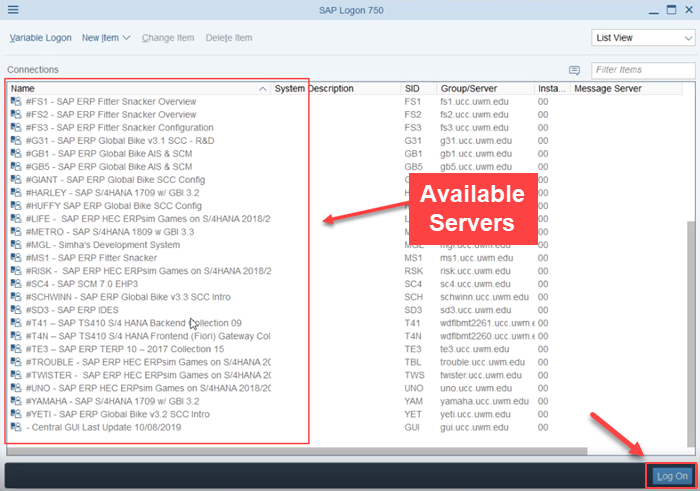
Step 1
Load the software on your computer. You will see several server options. Choose the server provided by the college and select Log On.
Step 2
Enter the following information:
- Client: A three digit client ID.
- User: Your registered user name.
- Password: The black dots do not disappear when you enter your password. Your password will override the equal number of dots. Be careful when entering your password as this can make it difficult to determine the number of characters you have entered.
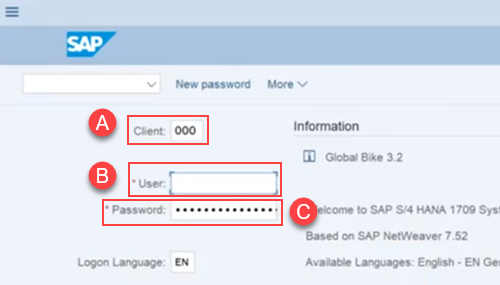
Press Enter on your keyboard. The SAP window will appear. See the Example of SAP GUI for more information.
First Time Logging In
If this is the first time logging in, follow steps 1 and 2 above and then complete the following.
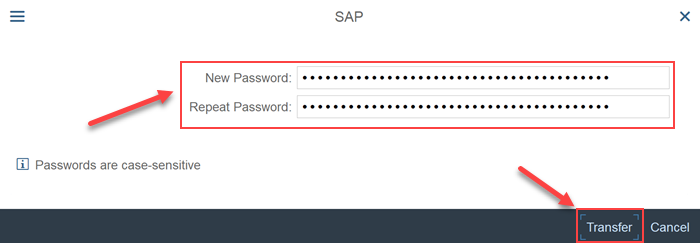
Step 3
You will be prompted to change your password. The text boxes will have black dots preloaded; this does not mean a password already entered. Place your cursor at the far left of the black dots and carefully type your password. The dots do not disappear when you type in the password.
Select Transfer to save your new password.
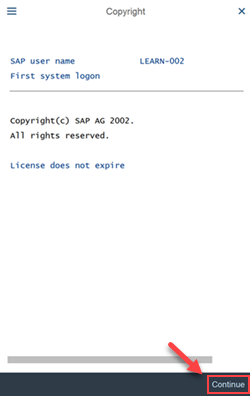
Step 4
A popup with copyright information will appear. Select Continue or the symbol after reading the information.
Step 5
A popup with general system messages may appear. Select the symbol to move on.
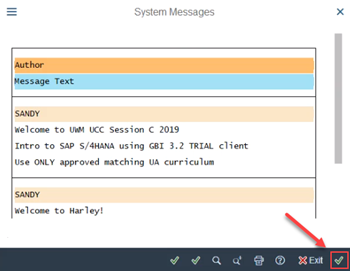
The SAP window will appear. See the Example of SAP GUI for more information.
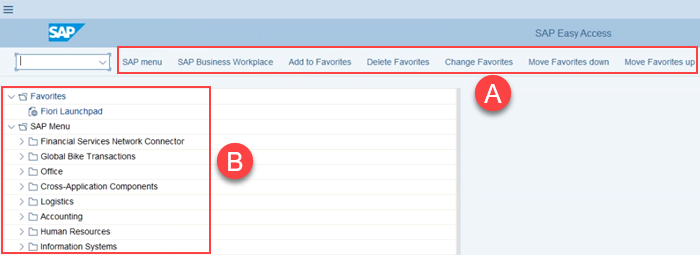
Example of SAP GUI
See the example workspace below:
- SAP tool bar: Manage SAP menu tools.
- SAP Menu: Find course specific content. Refer to the assignment in Canvas for what content is needed.
How to Download and Install SAP for Students
SAP requires you download and install a GUI. You must have administrative rights to install the software on your device.
Note: If you have previously installed the SAP GUI on your device you may need to reinstall or update. Follow the instructions below to be sure your version is up to date. While some verbiage may be slightly altered based on how much of the download and/or installation process you have completed, the steps should be the same.
You must complete both parts in the installation process: Part 1: Install Java and Part 2: Install SAP GUI
Throughout this guide, you may receive an error that the application cannot be opened as it is from a non-Apple developer. Follow Apple's guide to open third-party developer applications whenever prompted.
Part 1: Install Java
If you already have Java Version 8, Update 241 or higher, you can skip to Installing SAP GUI.
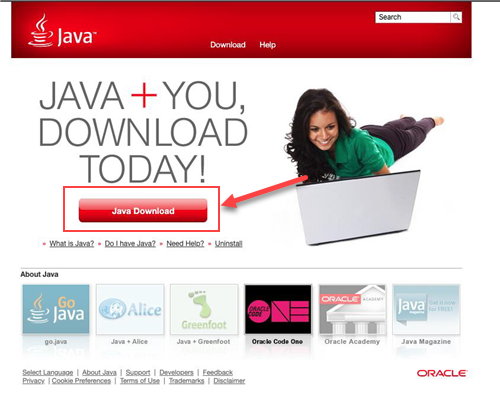
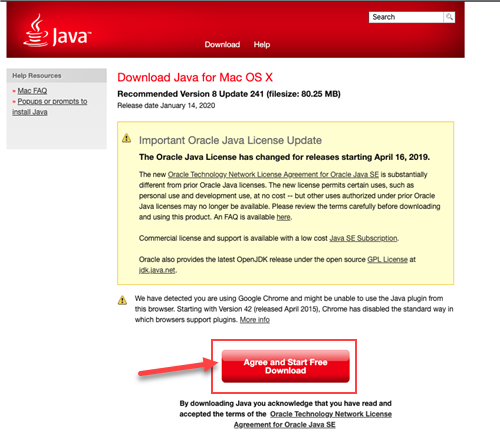
Step 2
Select Agree and Start Free Download to install Java on your MAC.
Note: Java versions in this guide may be different than pictures shown. Download the latest version.
Step 3
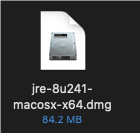
The file will be downloaded and placed in your Downloads folder. Open Finder and open the downloaded Java file: jre-###-macosx-x64.dmg
Step 4
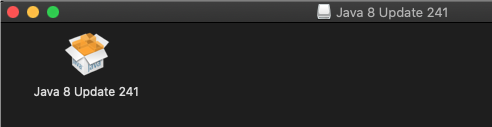
Double-click the Java # Update ### installer to open it.
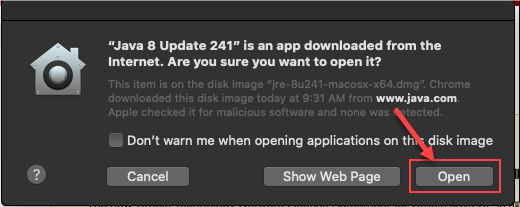
You may be prompted to allow the downloaded app. If so, select Open.
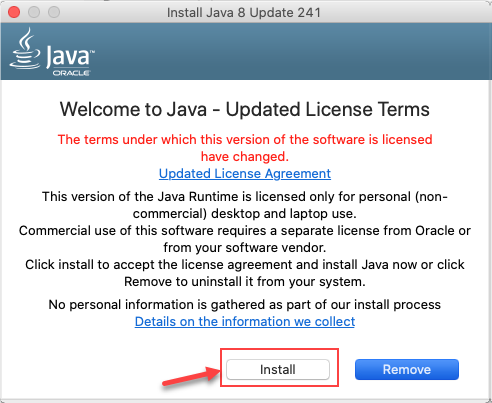
Step 5
A new window will appear. Select Install.
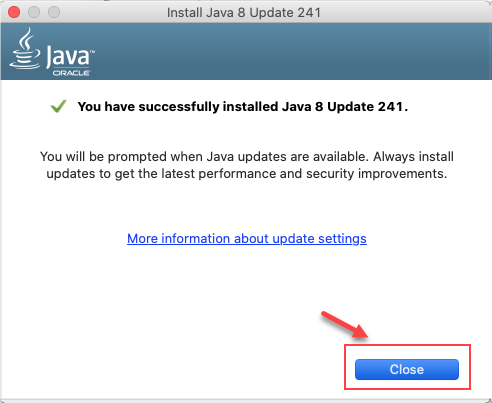
Step 6
Once the Java installation is completed, select Close.
Part 2: Install SAP GUI
Step 1
Download the GUI780Installation_5-70007413.ZIP file. Extract the file on your device and open GUI780Installation_5-70007413.DMG.
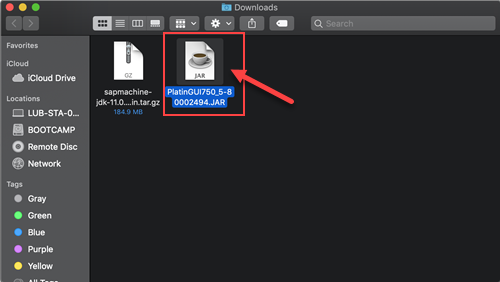
Image may not reflect up to date file name.
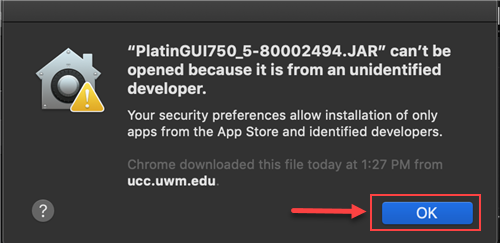
You will likely see the following error message that states the file can't be opened because its from an unidentified developer. Follow Apple's guide to open third-party developer applications.
Step 2
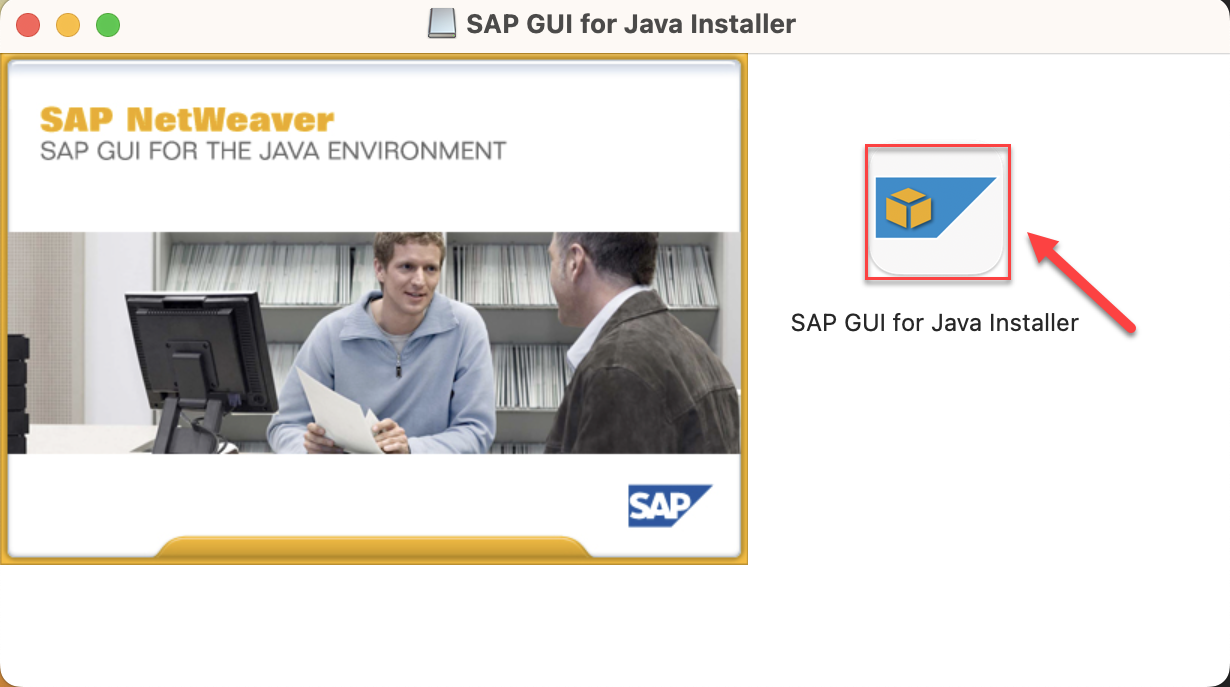
After you approve the application, select SAP GUI for Java installer.
Step 3
When the SAP GUI for Java installer opens, select Next.
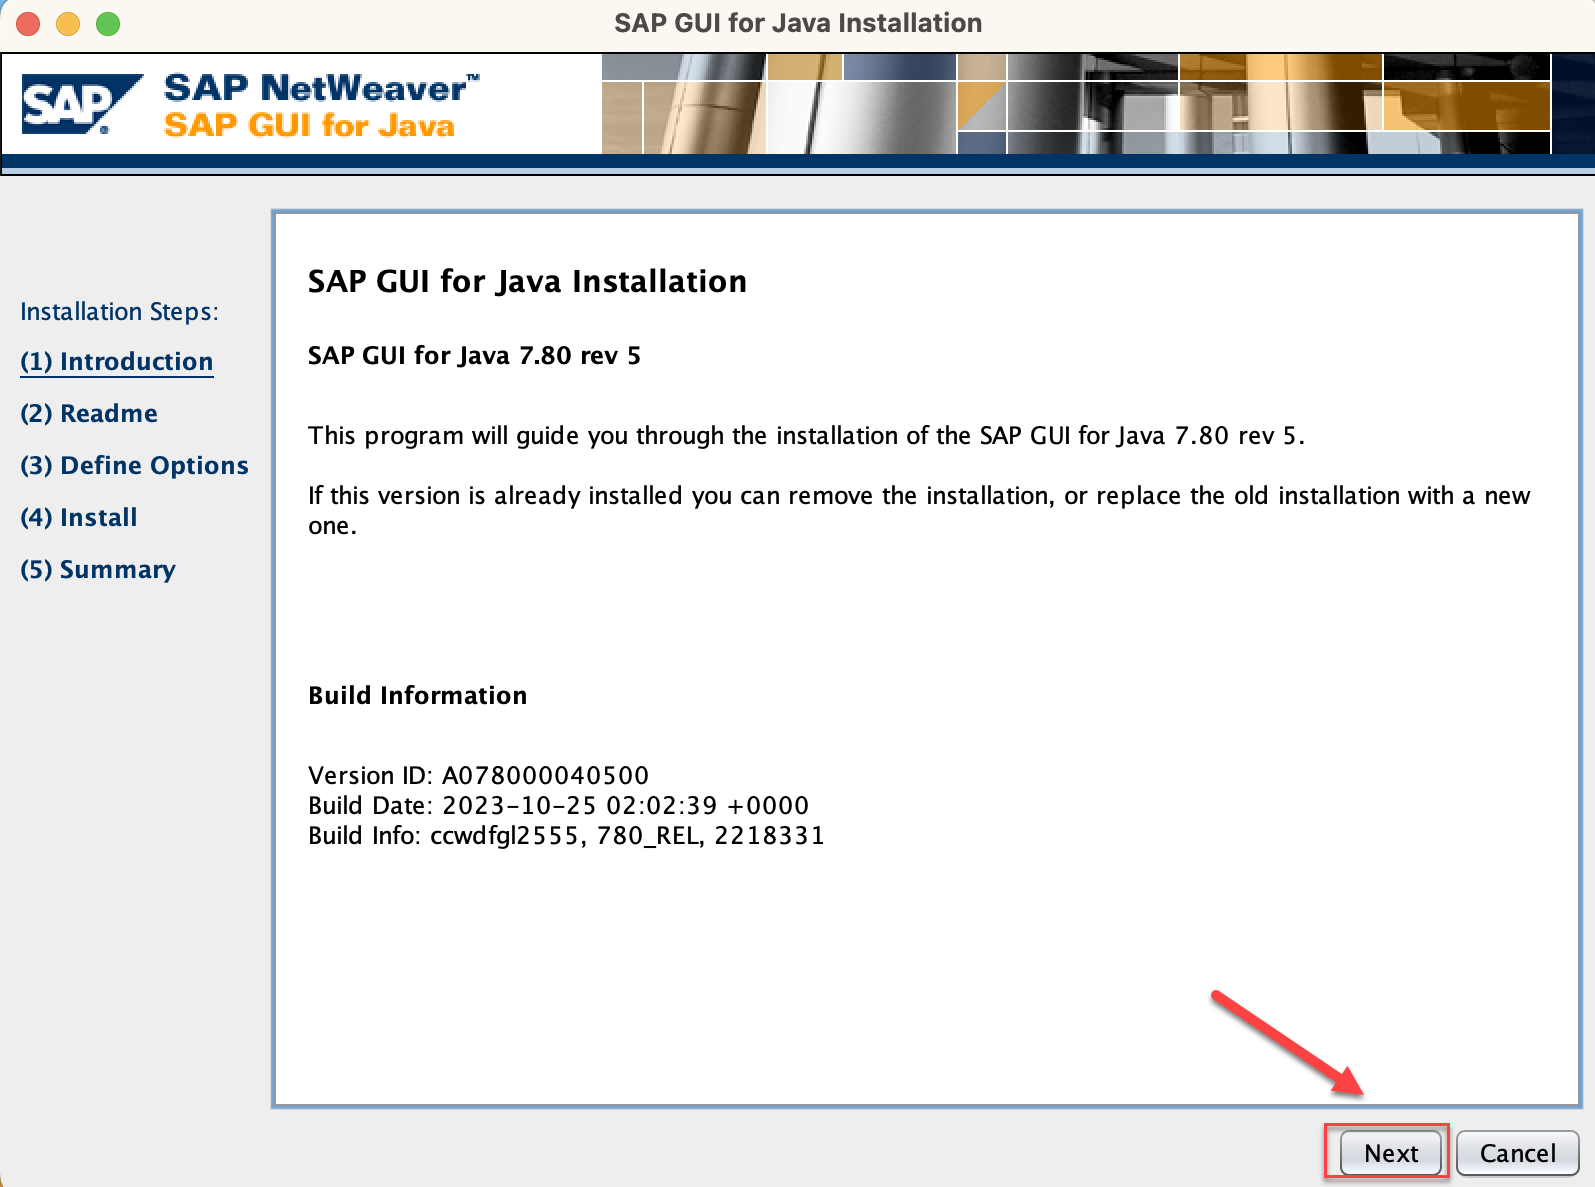
Step 4
Read the requirements notes and then select Next.

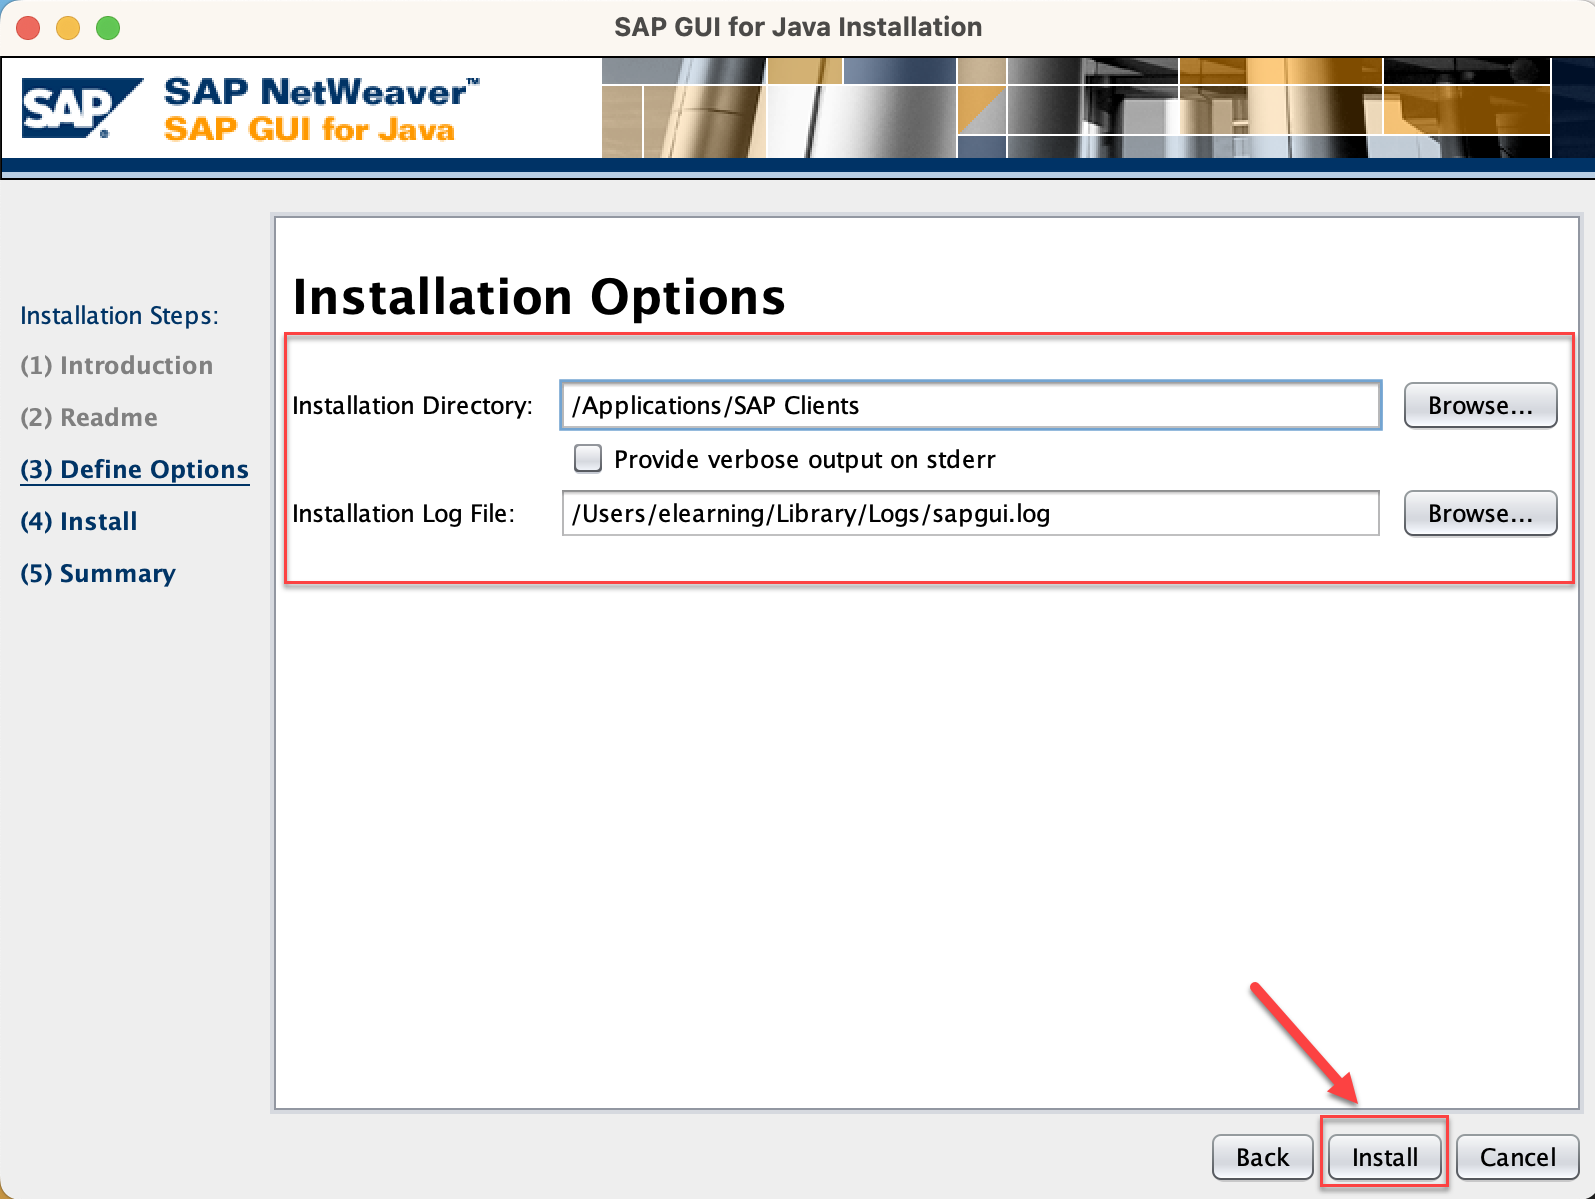
Step 5
Leave the default entries. Select Install.
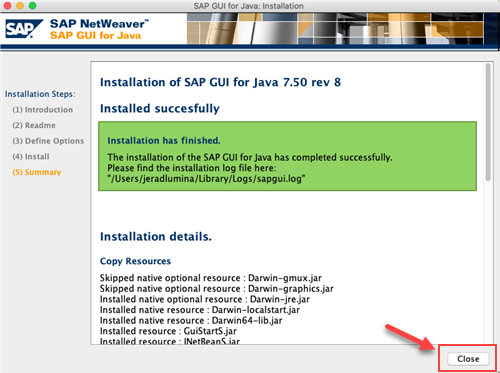
Step 6
Once the SAP GUI for Java installation is completed, select Close.
You are now ready to login and use the SAP GUI for Java.
How to Login to SAP for Students
You will receive your server name, temporary password, and client ID from your instructor during the first week of the term. You must have this information to follow the steps below. If you have not received it from your instructor, reach out to them ASAP.
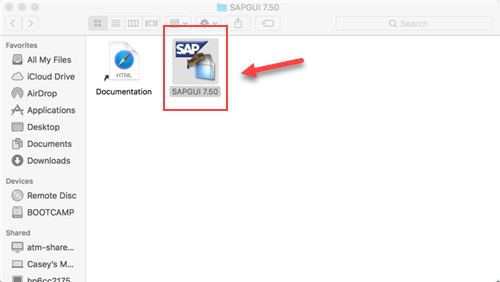
Step 1
Open Finder and navigate to Applications > SAP Clients > SAPGUI 7.50.
Open SAPGUI 7.50.
Step 2
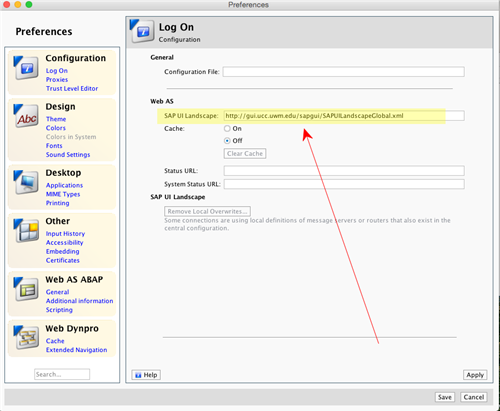
On the top menu bar, select SAPGUI > Preferences.

Step 3
In the Log On area, find the SAP UI Landscape text-box and paste the following link :
http://gui.ucc.uwm.edu/sapgui/SAPUILandscapeGlobal.xml
Step 4
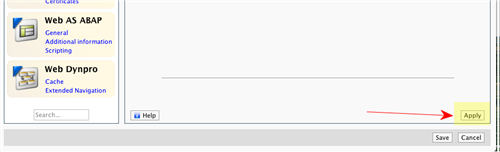
Select Apply and close the preferences window.
Step 5
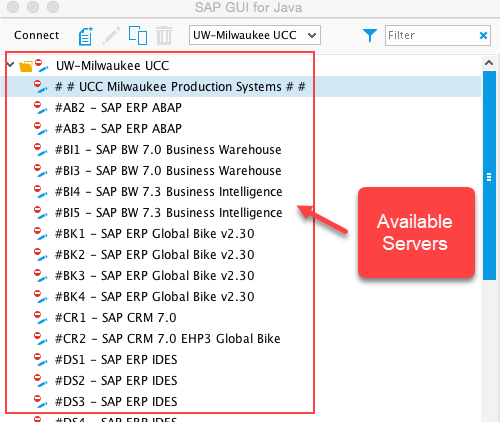
In the SAP GUI for Java Window, select UW-Milwaukee UCC from the drop-down menu.
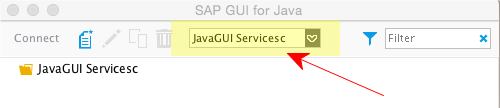
The SAP server list should now be populated. Double-click on the system specified by your instructor to connect.