Manage Your ePortfolio
Before you begin managing your digital portfolio, it's important to understand the following:
- A digital portfolio is a collection of sample work by a student, demonstrating a student's growth and learning progression through educational, extra-curricular, and work experiences.
- An artifact helps identify coursework you've done that you can then reflect upon. They are aligned with program learning outcomes and your success indicates you've mastered degree-relevant skills. Artifacts are organized in ePortfolio as projects but can include coursework like assignments, quizzes, group work, etc.
- A project in ePortfolio can include attachments, skills, software/tools you master, a project description, etc. You can utilize the commenting feature as well as the share features to reflect upon and share your work with potential employers, your instructor(s), etc.
- A connection in ePortfolio is a networking feature that allows you to connect with peers, faculty, and potential employers that utilize ePortfolio. Read more about ePortfolio Connections.
- ePortfolio allows you to organize your artifacts by education and by courses completed, as well as other relevant section types (athletics, clubs, work experiences, accomplishments, etc). This is a great way to showcase your progress course by course and highlight your growth from ERAU programs as well as programs outside of ERAU.
Select an option from the left menu to learn more about how to manage your profile and artifacts, as well as share your profile and projects with classmates, instructors, and employers.
Have a question not answered on this page? Visit the Canvas Student ePortfolios Network for additional guidance.
Overview of Profile Page
Your ePortfolio profile is accessible via Canvas or directly by going to the ePortfolio website. Below is a brief description of its features:
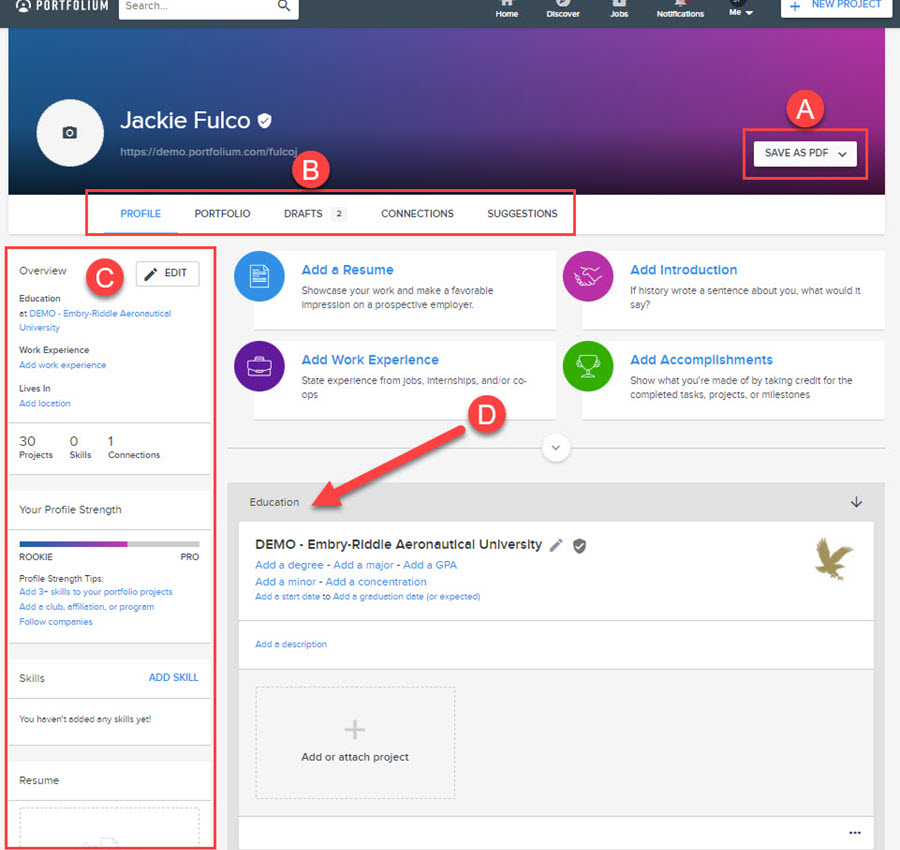
- Allows you to save your profile as a single or multi-page PDF.
- In addition to your profile, you can access your portfolio(s), drafts, connections, and suggested connections.
- This area of your page showcases quick facts about you, including your resume, introduction, work experience, etc. Be sure to Edit this area frequently to ensure your profile is as robust and up-to-date as possible.
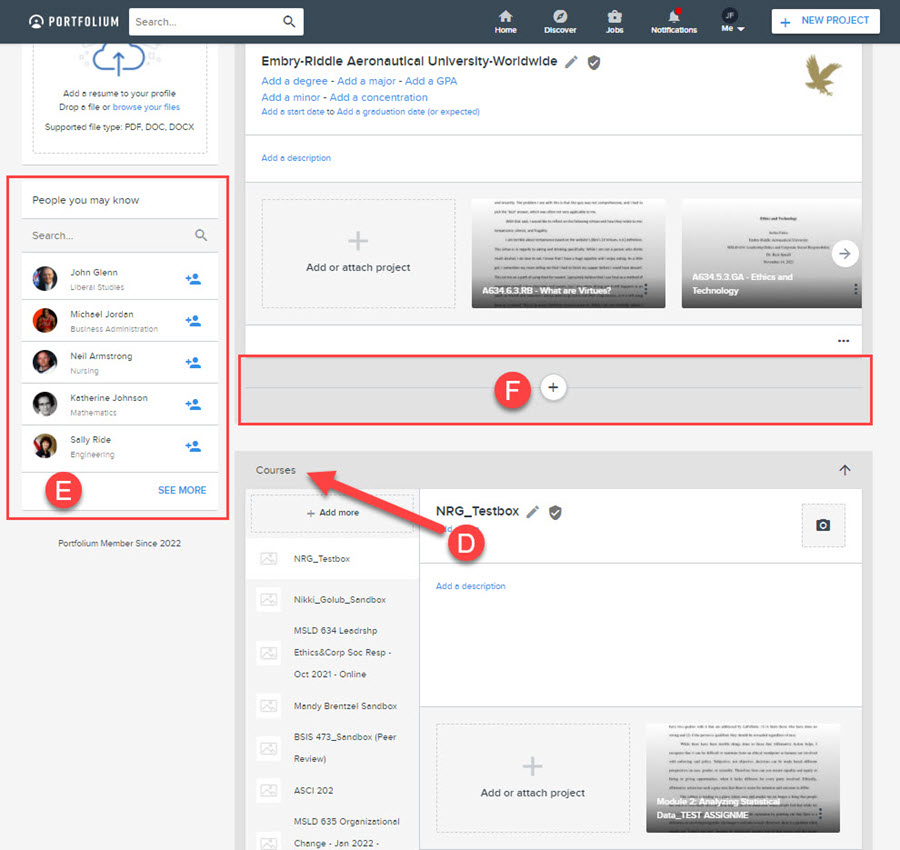
- Notice this area in both images - your profile is separated by your courses and your educational experience. Because you can use ePortfolio outside of ERAU content, this may be a great way for you to showcase work you did at another university or in non-ERAU programs.
- A list of potential connections will always be display - these may be fellow students or faculty within the organization and are meant to help your network.
- Here you can add additional education experiences outside of ERAU.
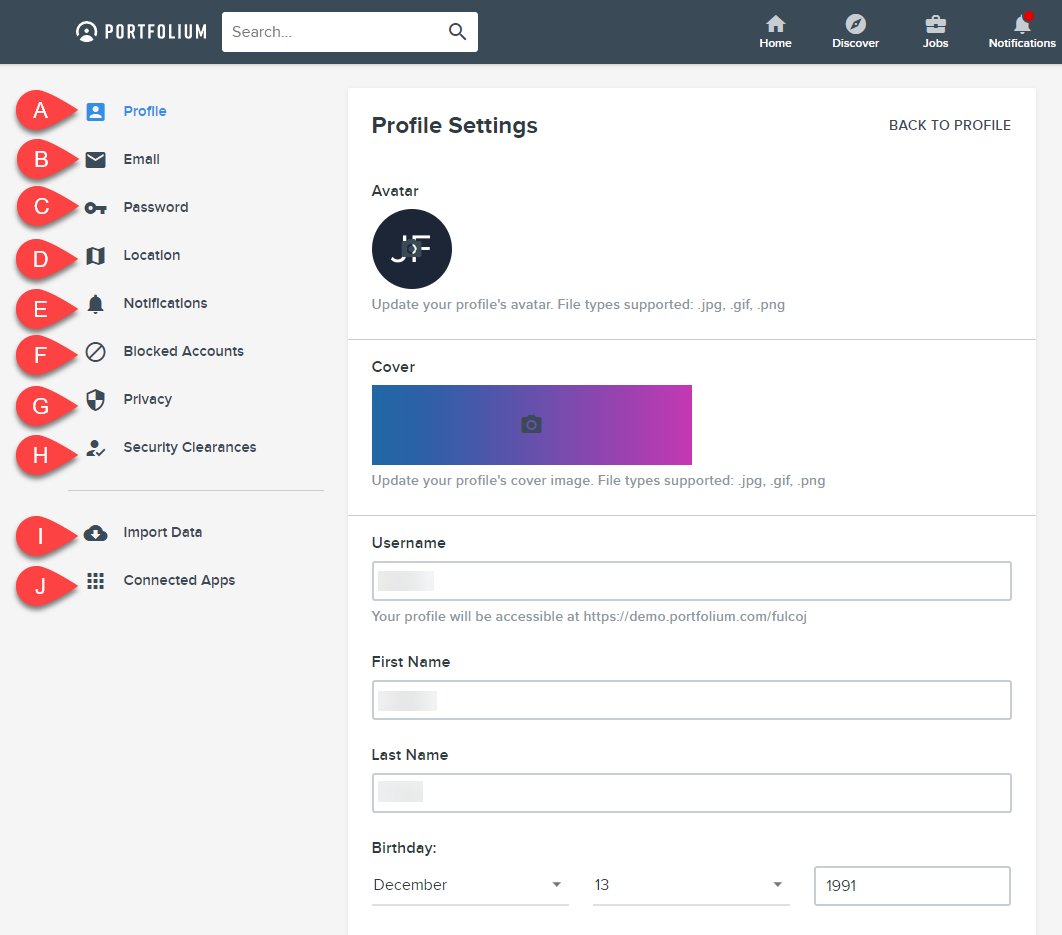
Profile Settings
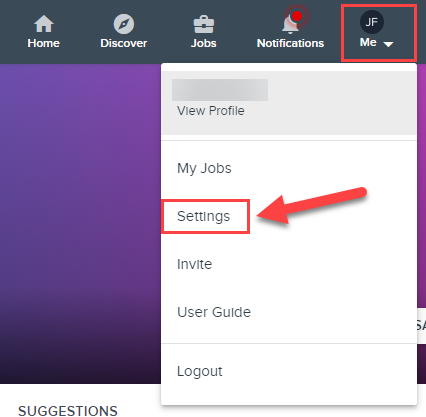
Access your Profile Settings by navigating to the gear icon in ePortfolio and selecting Settings.
Read more about the profile settings below. You may also review the Canvas Guide on the Profile and Settings.
- Profile: You can customize your profile to look and feel however you want! This is where you edit your display name, add an avatar and cover image, add social media links or a GitHub URL, etc.
- Email: By default, if you made your connection via Canvas, your email address is your default Canvas email (ERAU). However, you can add additional emails. You can also add emails of other ePortfolio accounts, if you have them, in this area. Be careful changing your password and email address because it must match your Canvas email and password for the Canvas connection to continue working.
- Password: Be careful changing your password and email address because it must match your Canvas email and password for the Canvas connection to continue working.
- Location: By default, your location will be set to ERAU's address. You can change this to your personal or business address as you see fit.
- Notifications: Control your notifications regarding potential jobs, networking opportunities, portfolio updates, profile changes, and tasks associated with graded assignments.
- Blocked Accounts: You can block inappropriate users on the platform.
- Privacy: Allows you to determine who can view your profile, explains how the website collects your data and allows you to access to download a copy of your ePortfolio information.
- Security Clearance: You can include the security clearance you have received - this is meant to help employers find you based on specific security requirements.
- Import Data: This is where you import data from Canvas (or other tools like Badgr), including assignment submissions.
- Connected Apps: Currently, ePortfolio also allows you to connect Twitter and Google to your account.
How to Import Canvas Assignments
ePortfolio allows you to import Canvas assignments as projects, saving you time and effort! Any assignment you've submitted in Canvas can be pulled into ePortfolio as part of your digital portfolio. Once you've imported your assignments, they can be organized.
Step 1
Select Account from the Canvas global navigation.
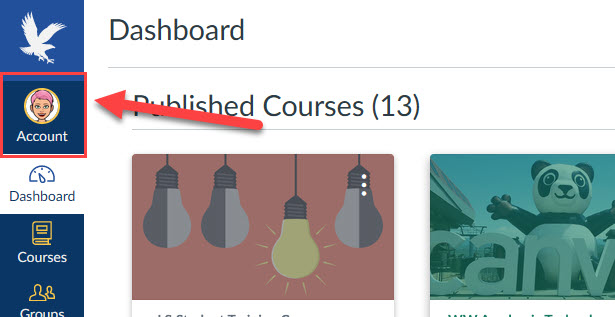
Step 2
Select ePortfolios (New).

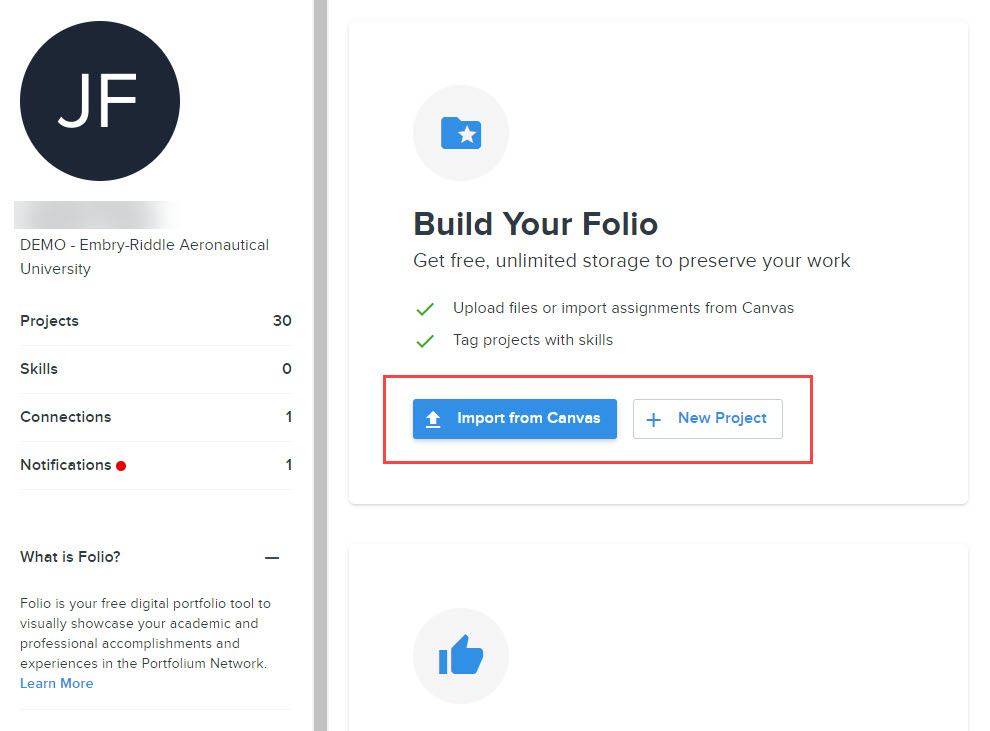
Step 3
The ePortfolio connection to Canvas will load in Canvas. You'll be able to select either:
- Import from Canvas: Allows you to import all assignments saved in your Canvas files, including past submissions to course assignments. Submissions brought into your ePortfolio via this option will be organized by the associated course.
- + New Project: Allows you to add a new project manually, which could include important artifacts not turned in for a Canvas assignment (i.e., discussion post, video, quiz result, certification, etc.) This can be organized into project folders later. If you choose to select + New Project, utilize the Manage ePortfolio: How to Create a New Project page for additional support.
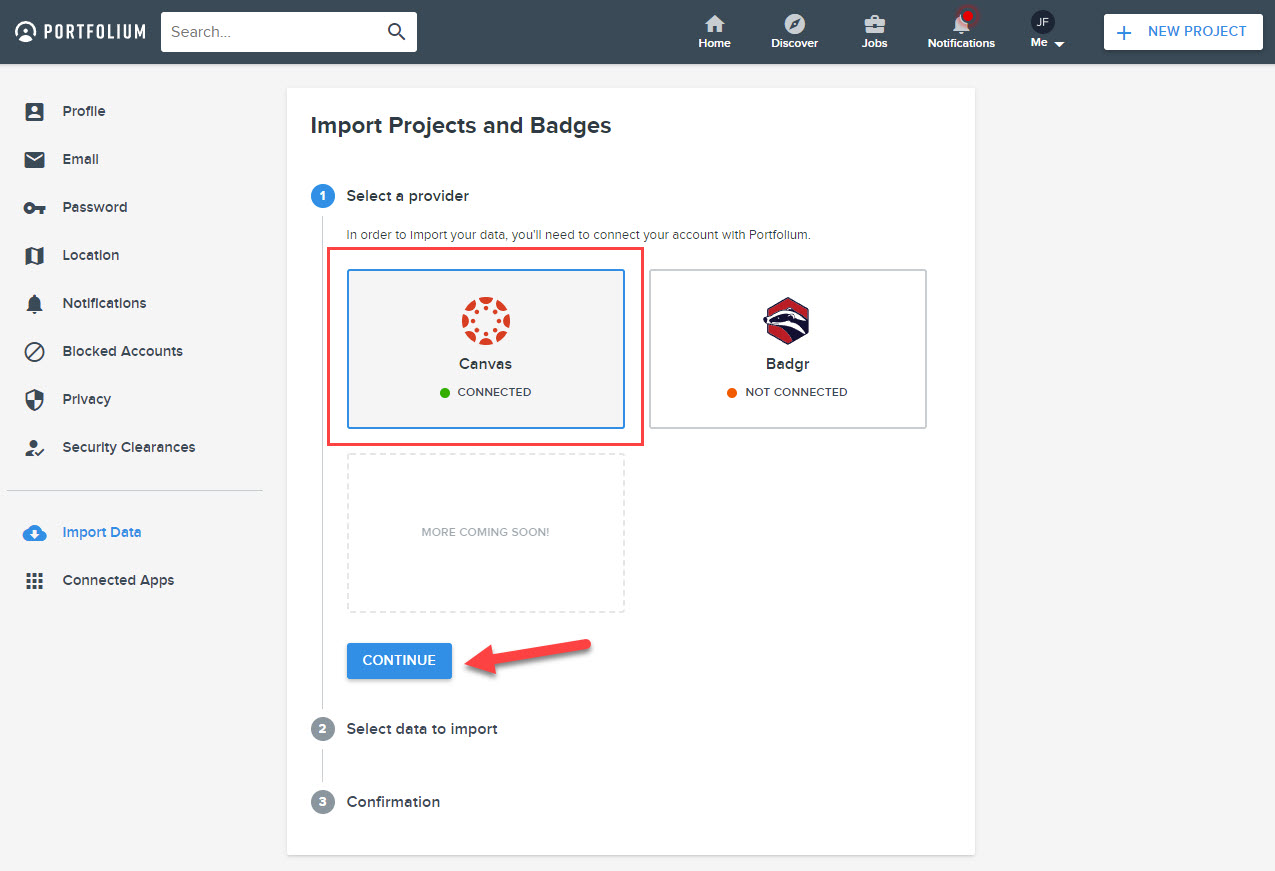
Step 4
If you choose to import your Canvas assignments, you'll be directed to select Canvas to connect to ePortfolio Follow the prompts on the screen to select assignments to import and confirm the import.
You're now ready to add sections, pages, and content blocks to your ePortfolio.
Create a New Project Manually
You can either create a new project by Importing from Canvas (see Import Canvas Assignments) or create a new project manually. Creating a project manually may be useful when adding non-ERAU affiliated projects or adding discussions, quizzes, group projects, etc. that do not import properly from Canvas.
In addition to selecting +New Project in the ePortfolio navigation, you can use the ePortfolio profile page to add projects to associated courses and educational institutes without having to manually Organize Artifacts later. Read more about these options below.
Step 1
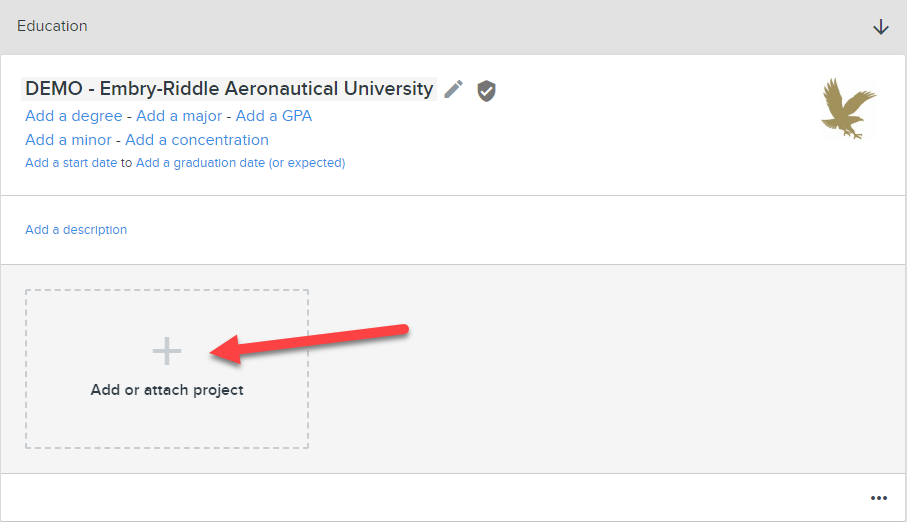
There are many ways to start a new project. You can do so from Canvas, your profile page, your dashboard, etc. In this step, the + Add new project option is accessed via your Profile page, under education. If you started a new project from Canvas, skip to Step 3.
Select Add or Attach project. A fly-out will appear.
Step 2
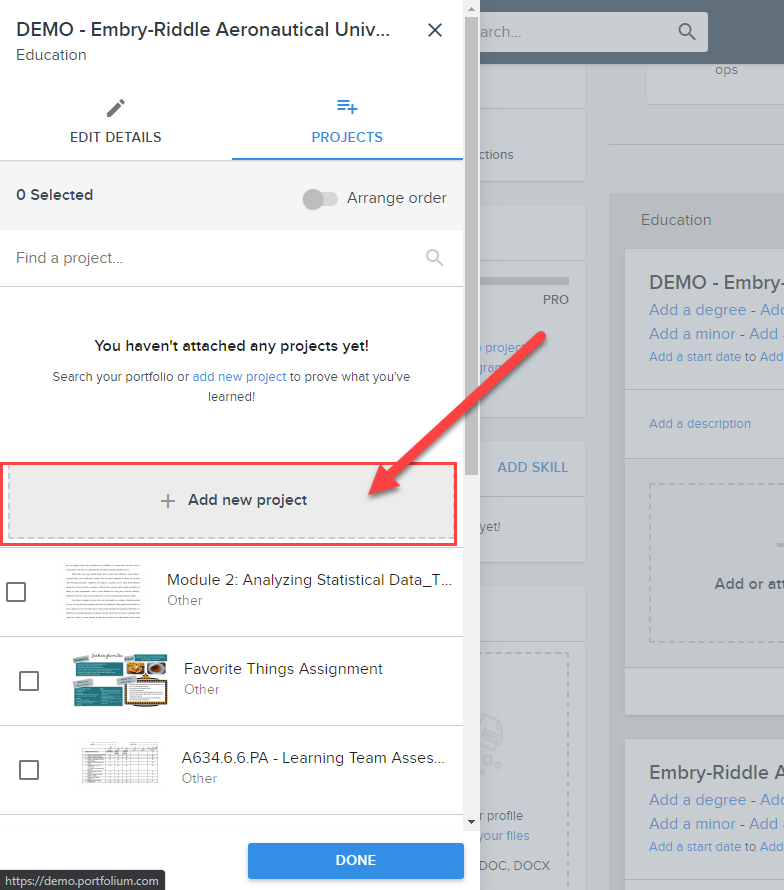
From the flyout, select + Add new project.
Step 3
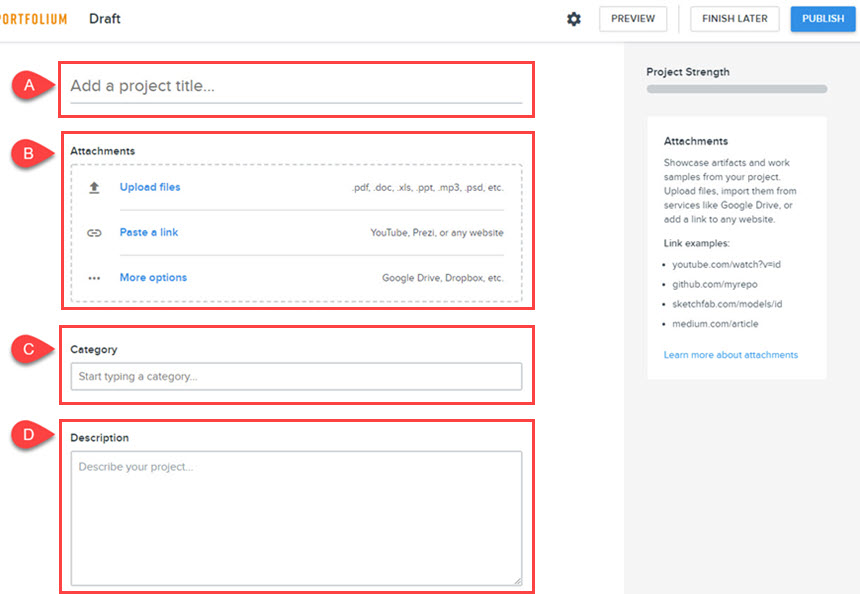
Read more about the details of a project that you must fill out before publishing the project to your portfolio.
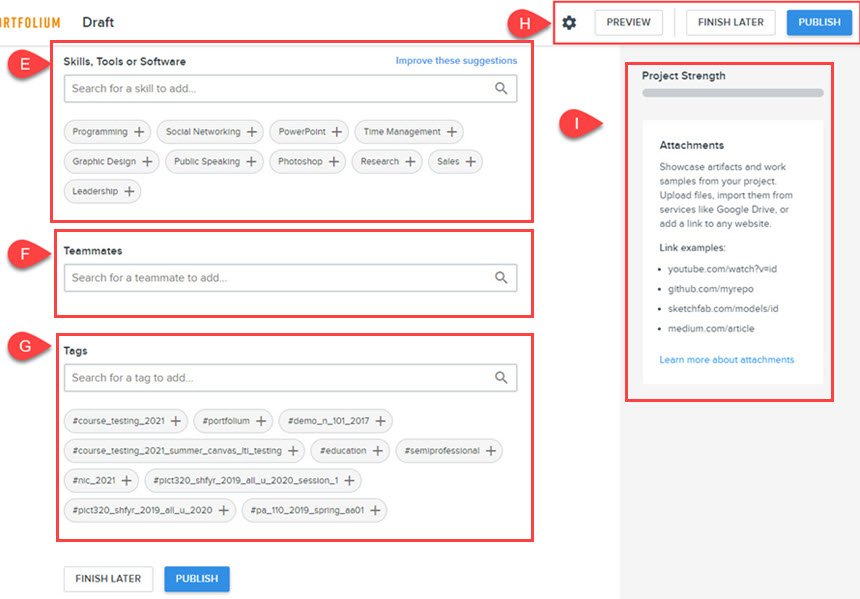
- Title: Be sure to title your project as accurately as possible - this will help profile viewers understand the nature of the project.
- Attachments: You can add multiple attachments, including images, links, files, as well as documents from your personal Dropbox, Google account, Microsoft OneDrive, etc.
- Category: Assign an ePortfolio category that is appropriate to the college; this will make your project searchable (if you have it set to public).
- Description: Provide a detailed description of the project. You may wish to include project requirements and directions to give context.
- Skills, Tools, or Software: ePortfolio has a wealth of potential skills you can choose from - add all skills, tools, or software that you utilize and demonstrate mastery of as a result of the project. You can search for a skill and create custom skills by typing in the Search bar.
- Teammates: You can only add Teammates that have also accessed ePortfolio and are connected with your account under Connections. Read more about Connections here.
- Tags: Tags allow you to add hashtag topics that can be used for easier filtering. Tags act as related topics for your project.
- Project Settings: Here you can select the project visibility. This can be public, ePortfolio members, your connections, or private. Tip: You can set a project as private initially as that enables you to preview the project and save it as a draft before officially publishing it to your profile and your news feed. Read more about project settings/ visibility.
- ePortfolio Tips: While you are filling out the form, ePortfolio will provide guidance (tips and support) and feedback regarding the strength and thoroughness of your project.
Edit or Delete Artifacts
Artifacts can be edited or deleted from your portfolio or profile at any time. The process to do both is the same. Locate the artifact you wish to edit/delete, either on your ePortfolio profile page or the portfolio page.
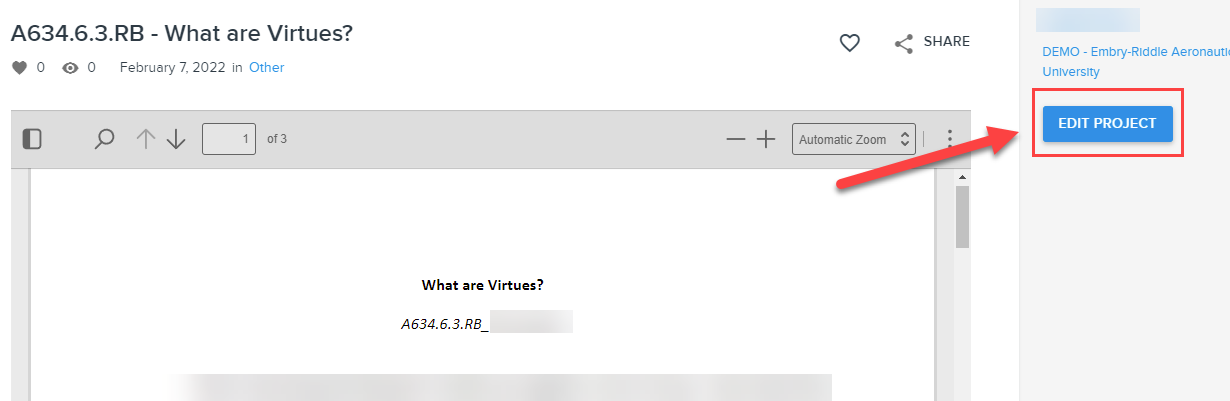
Access on Profile Page
If you try to edit/delete the artifact from your ePortfolio profile page, you can click the artifact and it will open the project. From there, you can select Edit Project.
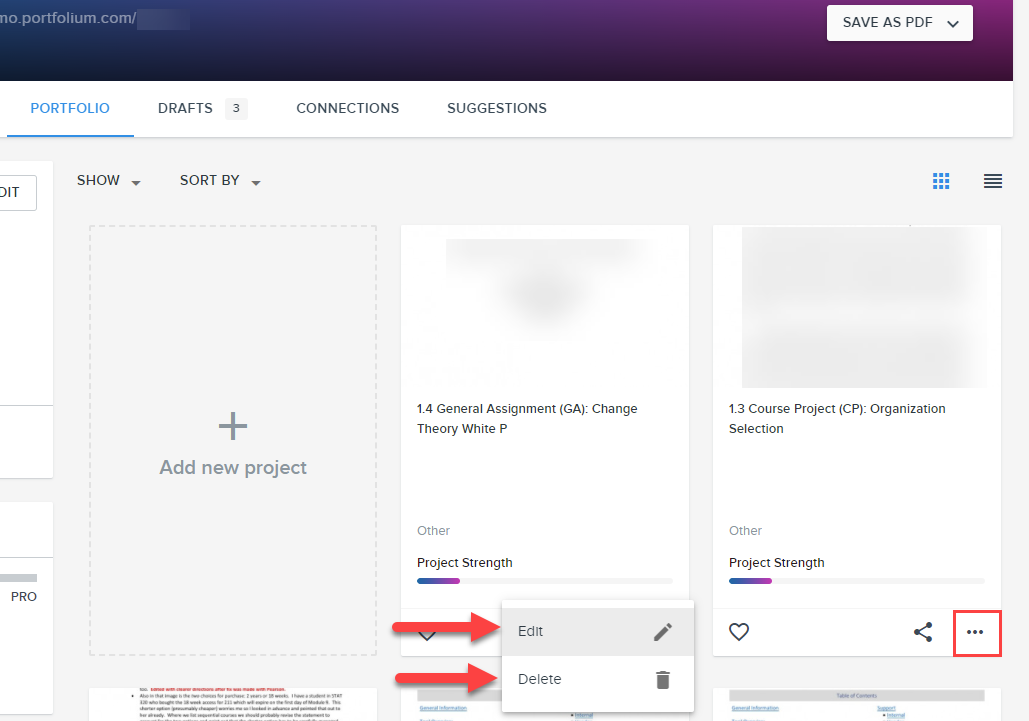
Access on Portfolio Page
If you try to edit/delete the artifact from the Portfolio tab on your profile, you can select the horizontal dots to either edit or delete the project.
Organize Artifacts
ePortfolio allows you to organize your artifacts by the educational institute and by course. This is a great way to showcase your progress course by course as well as highlight your growth from ERAU programs as well as programs outside of ERAU.
Your profile page is modular, so you can move the education and course modules by selecting the section arrow to move them up or down on the page. The more items (badges, certifications, accomplishments, work experience, athletics, etc) you add to your profile, the more sections your profile will have.

How to Organize Educational Institutes
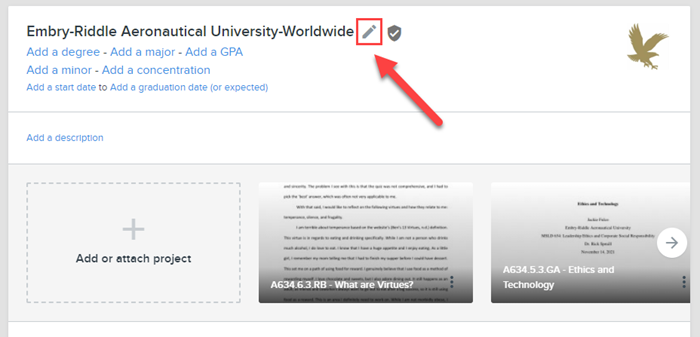
By default, if you signed in through Canvas (see Getting Started), you should already have Embry-Riddle Aeronautical University listed as an educational organization. You can add additional schools or businesses to the Education section by selecting + Add Education.
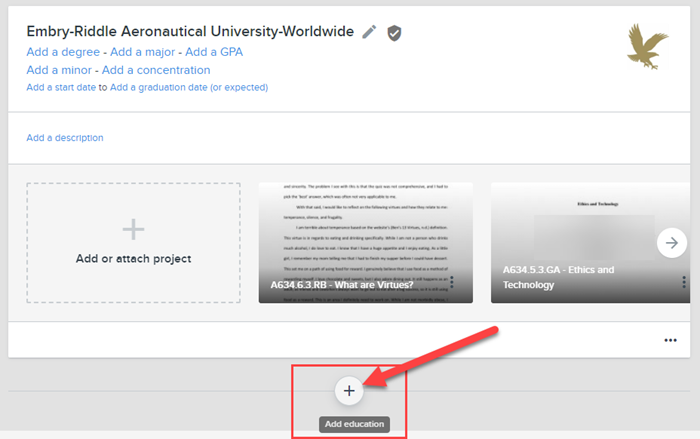
Select the pencil icon to edit the details of the educational institute; these details include your GPA, major, degree program, minor, and start and end dates.
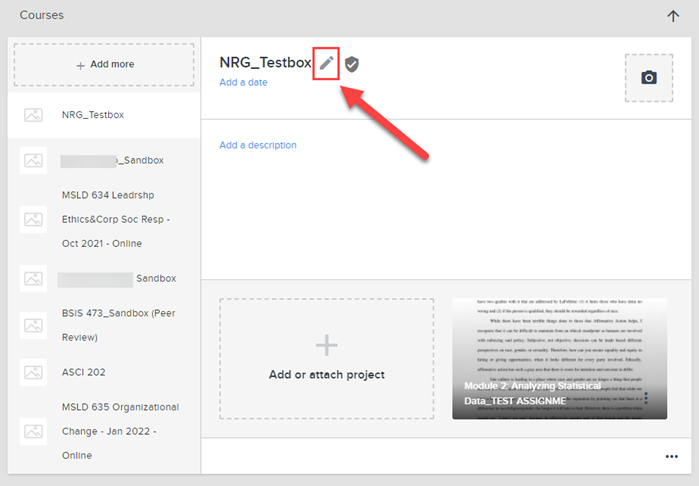
How to Organize Courses
If you import your Canvas data (see Profile Settings), you will also see all your courses at ERAU listed in a separate module of your ePortfolio profile page. You can add additional educational courses to the Courses section by selecting + Add More.
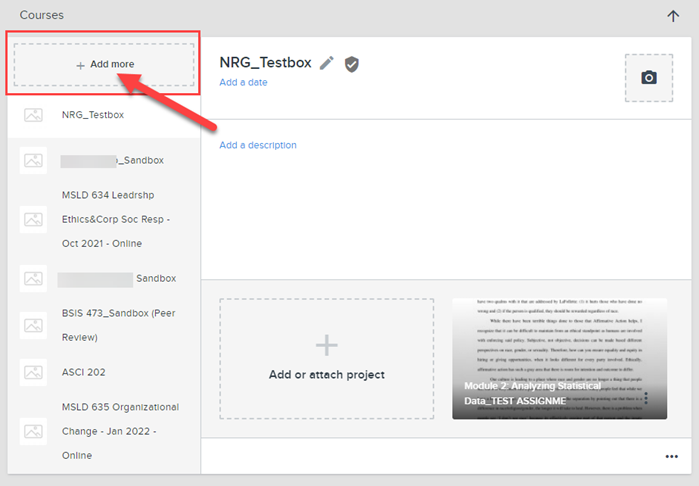
Select the pencil icon to edit the details of the course; these details include a description of the course, a completion date, and an image.