Software Installation
There are several steps to installing Microsoft SQL for course work. You'll need to install the management studio, create a server instance, and connect to the instance.
To begin installing the necessary software, select the tab that matches your operating system.
Have a question not answered in this guide? Visit the Support page for additional resources.
Windows 8 Installation
The Worldwide
Computer Requirements lists current minimum hardware requirements for Worldwide
students.
Windows 8 does not meet these requirements; users with the Windows 8 operating system are
encouraged to switch to Windows 10 as ERAU and Microsoft no longer support Windows 8.
The directions on this page cannot be tested or supported by ERAU staff, but are a courtesy
workaround for those users with Windows 8.
In order to install the SQL Server file type (.iso) on Windows 8 computers, you will need to first download third-party software that creates a virtual drive. A virtual drive is required to install the virtual Microsoft SQL file.
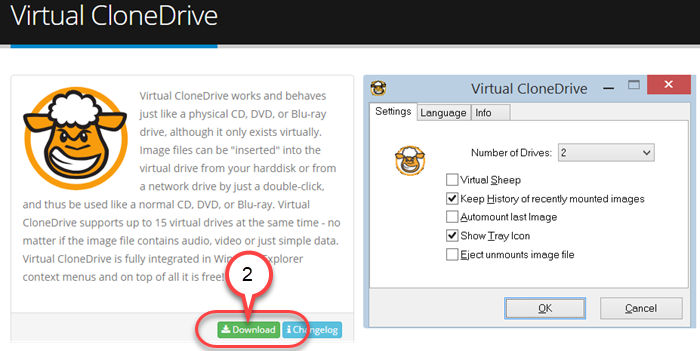
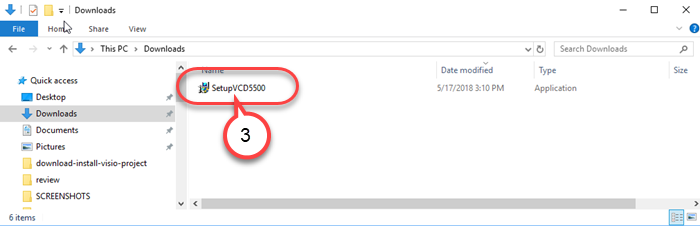
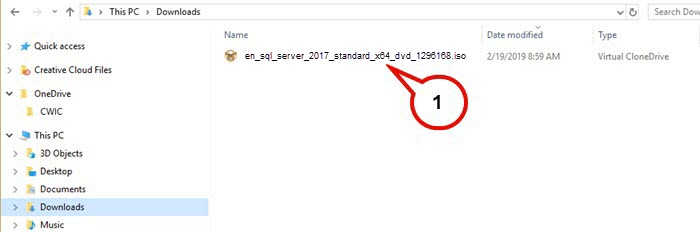
Step 2
Navigate to the folder where you downloaded the file. Locate the SetupVCD file and open it.
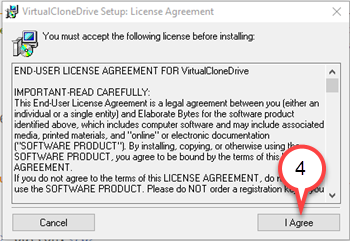
Step 3
Select I Agree to accept the Virtual CloneDrive License Agreement.
Step 4
Select Next to continue.
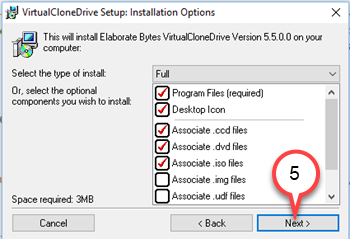
Step 5
Select Install.
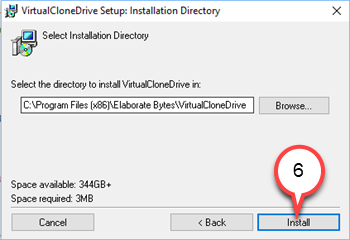
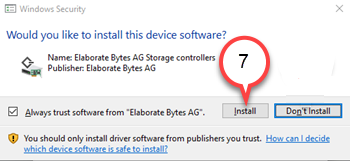
Step 6
Select Install to add Elaborate Bytes AG storage controllers.
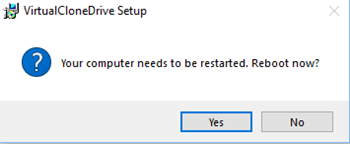
Step 7
When the Virtual CloneDrive installation is complete, you will need to restart your computer.
Step 8
Now you will need to install SQL Management Studio. Navigate to the SQL Server file you downloaded and open it.
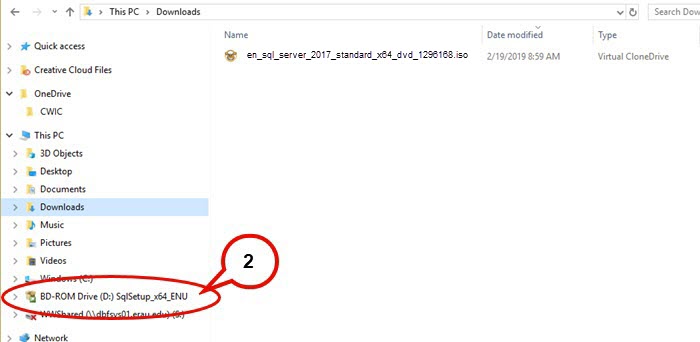
Step 9
In the Windows navigation pane, locate BD_ROM Drive (D:) and open it.
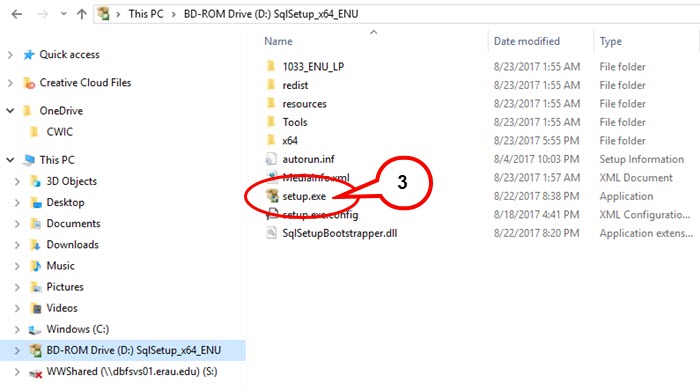
Step 10
Open the setup executable file.
Note: You will need administrator priveleges to open this file.
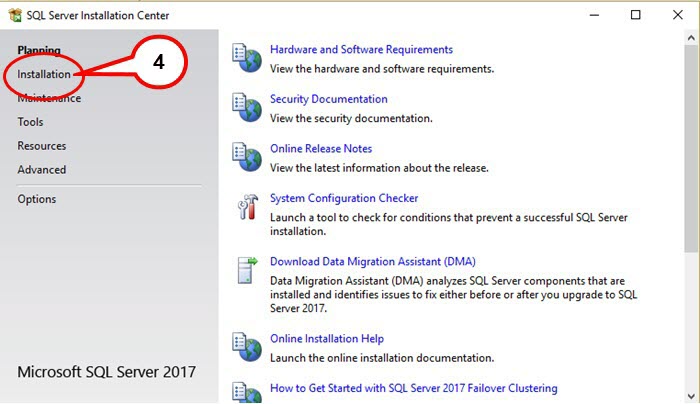
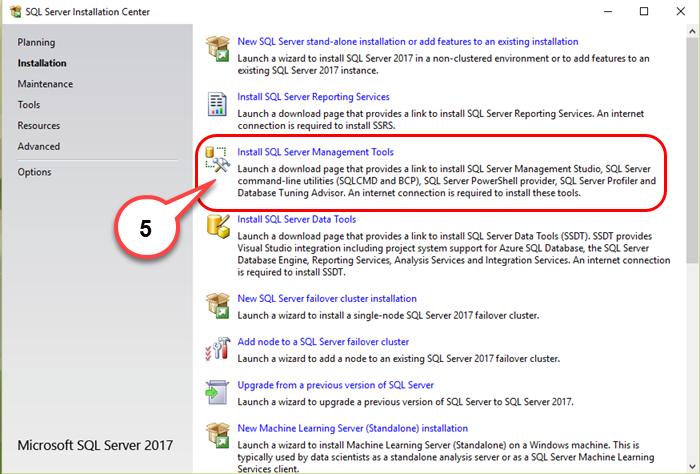
Step 11
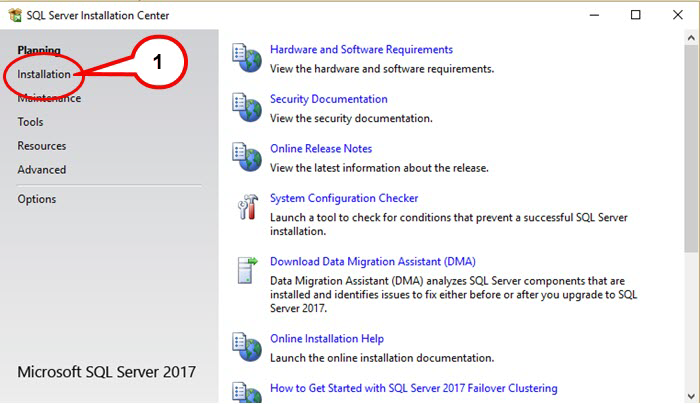
In the SQL Installation Center window, click on the Installation tab.
Step 12
Select Install SQL Server Management Tools.
Note: Advanced users may repeat these steps to Install SQL Server Data Tools for more functionality
.
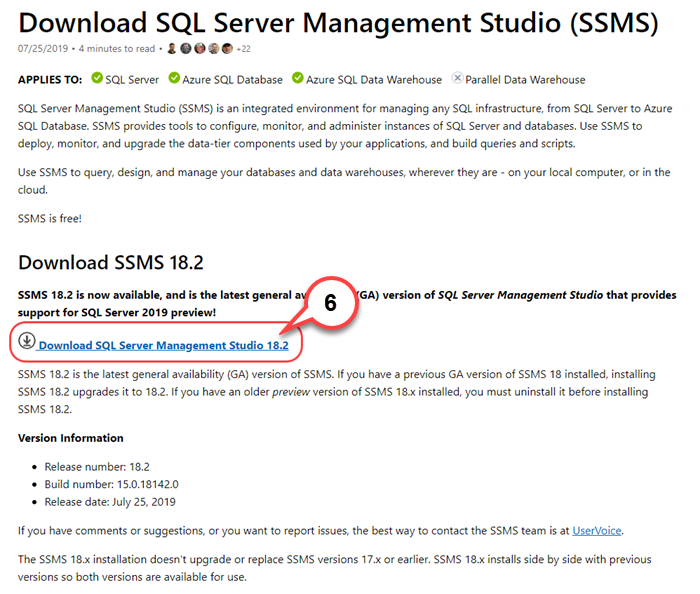
Step 13
The Download SQL Server Management Studio (SSMS) link will automatically open in your browser. On this page, select the most up to date Download SQL Server Management Studio file. Then open the downloaded file on your computer. It may prompt you to allow the download to open a file on your computer.
Step 14
Select Install to begin the installation. This process may take up to 30 minutes to complete.
Now that you have installed SQL Server Management Studio, proceed to Create Server Instance.
Windows 10 Installation
Step 1
Locate the SQL Server file you downloaded.

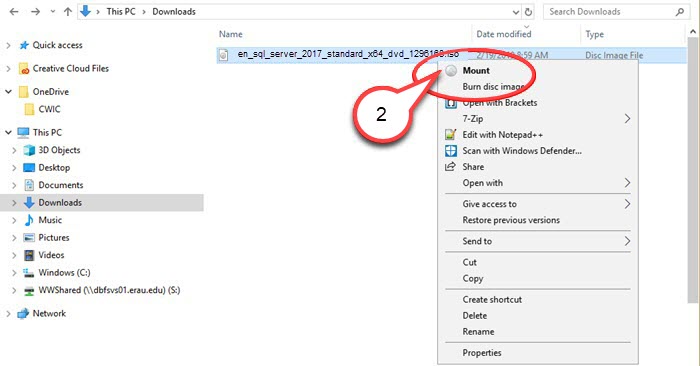
Step 2
Right-click the SQL Server file and select Mount from the menu.
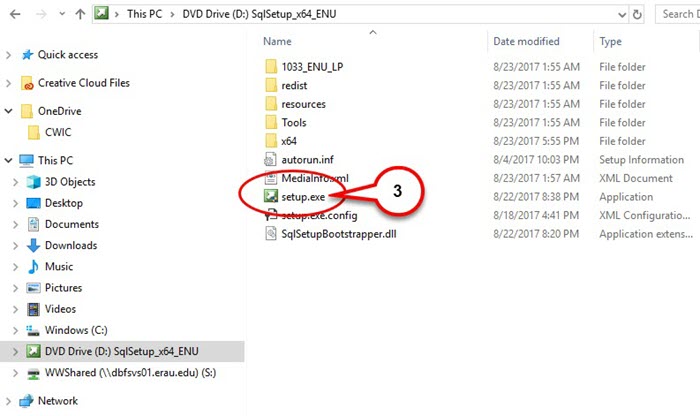
Step 3
Your DVD Drive will open. Open the setup executable file.
Note: You will need administrator priveleges to open this file.
Step 4
In the SQL Installation Center window, click on the Installation tab.
Step 5
Select Install SQL Server Management Tools.
Note: Advanced users may repeat these steps to Install SQL Server Data Tools for more functionality
.
Step 6
The Download SQL Server Management Studio (SSMS) link will automatically open in your browser. On this page, select the most up to date Download SQL Server Management Studio file. Then open the downloaded file on your computer. It may prompt you to allow the download to open a file on your computer.
Step 7
Select Install to begin the installation. This process may take up to 30 minutes to complete.
Now that you have installed SQL Server Management Studio, proceed to Create Server Instance.
Creating a Server Instance
Step 1
Return to the SQL Installation Center window. Then click on the Installation tab.
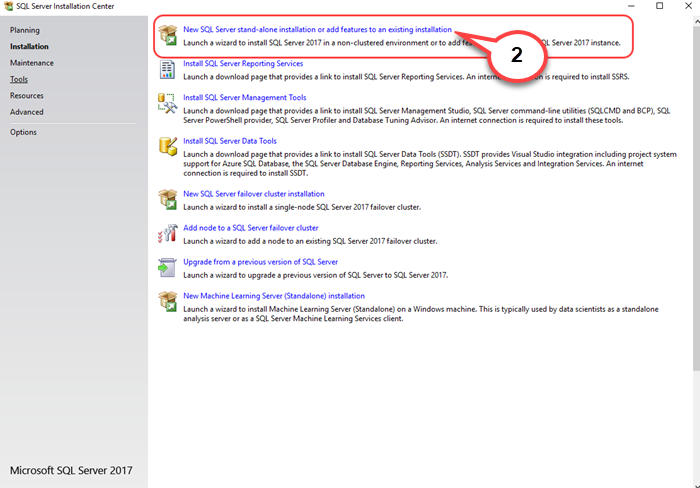
Step 2
Select New SQL Server stand-alone installation or add features to existing installation. It may take a few moments for the set-up software to process.
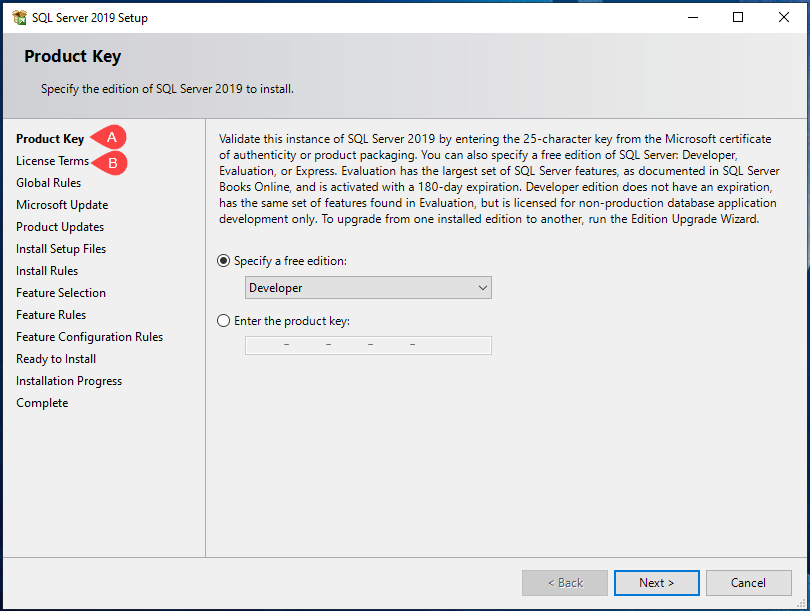
Step 3
You will be prompted to enter a Product key. Instead, check the bullet for "Specify a free edition" and set the drop down to "Developer". Then click Next >.
Step 4
Note: You may be prompted to do a Microsoft Update before the next sections. If so, please complete the prompts on the screen. This step will not appear if you have Microsoft up to date prior to installation.
- The installation will automatically check for Global Rules and move forward.
- Then it will complete Product Updates. Select Next when it is complete.
- It wil automatically complete Install Setup Files and move forward.
- Then it will prompt to Install Rules. Select Next to install these rules.
Note: Windows Firewall will give a warning if your computer has a firewall installed. This is normal.

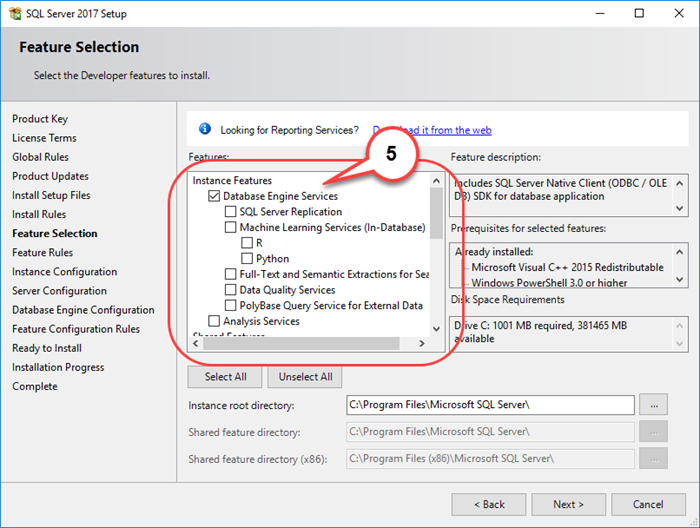
Step 5
In Feature Selection, select Database Engine Services, then select Next.
Step 6
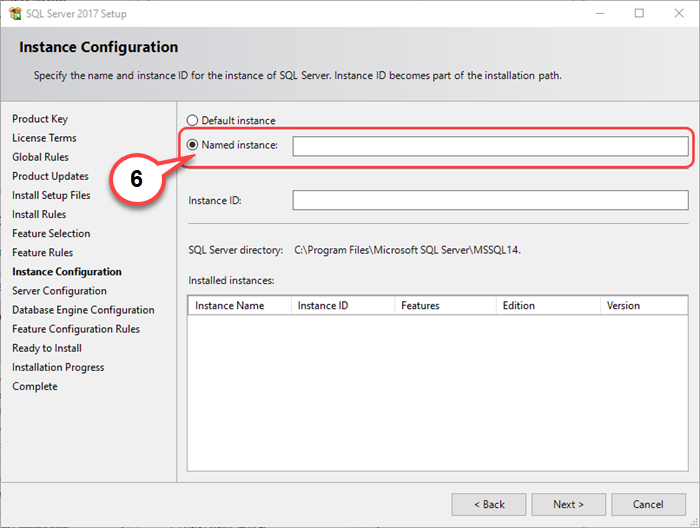
Name your instance 'LASTNAMECLASSNUMBER'. For example, 'DOEMMIS503'. You cannot have spaces in the name. It will automatically populate an Instance ID and a SQL Server directory for you.
Select Next.
Note: Any additional SQL Server instances you have on the computer will appear in the installed instances box.
Step 7
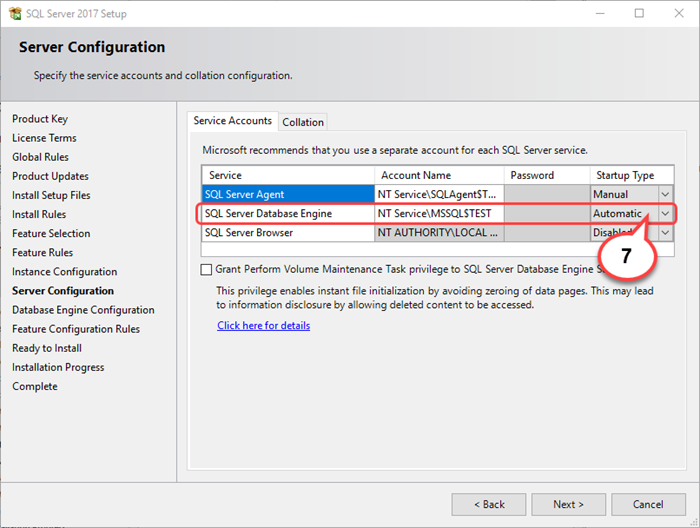
Make sure the Server Configuration shows the new instance as Automatic and select Next.
Step 8
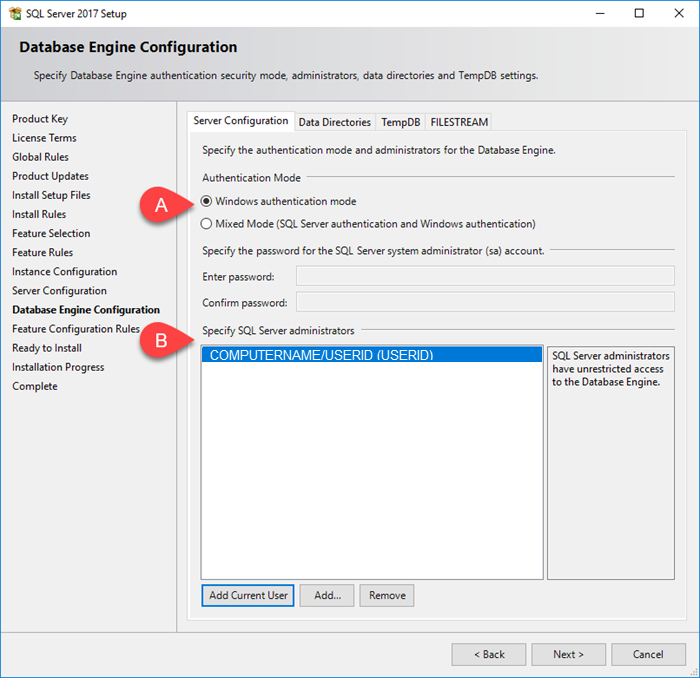
- You will be prompted to allow access via a password or Windows authentication. Your options are:
- Windows Authentication Mode: It will allows you to access it automatically if you are already authenticated.
- Mixed Mode: This is a mix of using Windows authentication mode and having an additional secure password that must be inputted before accessing server.
- Then click Add Current User to add the current login credentials you are
using as a Specific SQL Server Admin. It will add in the following format:
COMPUTERNAME/USERID (USERID)
Select Next when complete.
Step 9
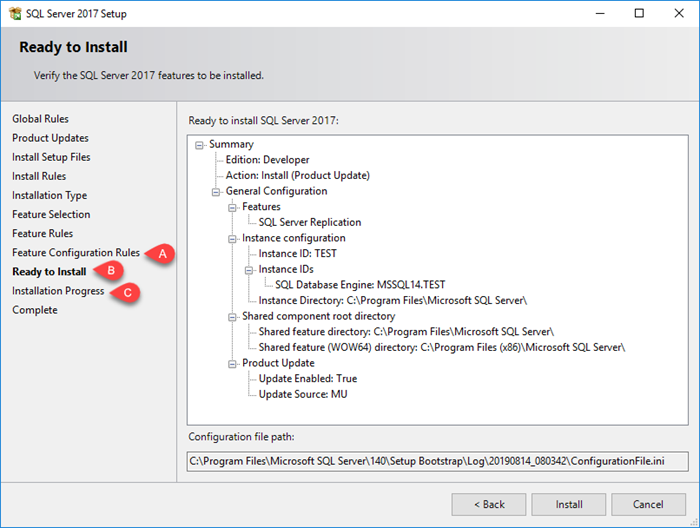
- The installation will automatically complete Feature Configuration Rules.
- You will be prompted to review the settings in Ready to Install. Select Install when you have reviewed the details.
- The installation will happen automatially and will display a completed screen when it is finished.
Step 10
Now that you have the SQL stand-alone server instance on your computer, you need to connect to it using the Server Management Studio. Proceed to Connect to SQL Server.
Connect to SQL Server
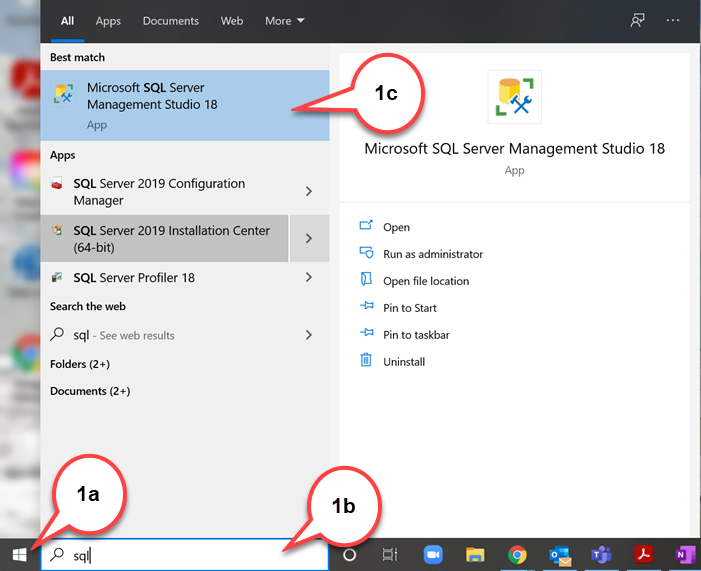
Step 1
To find and open SQL Server on your computer:
- Select the Start button.
- Type "Microsoft SQL Server Management" in the search box.
- Select the Microsoft SQL Server Management Studio app.
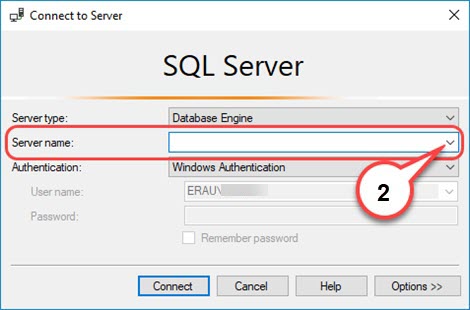
Step 2
The instance you created will not appear in the Server name option immediately. However, if you have other instances already installed on your computer, they will appear here. Do not connect to these instances.
Open the drop down and select Browse for more...
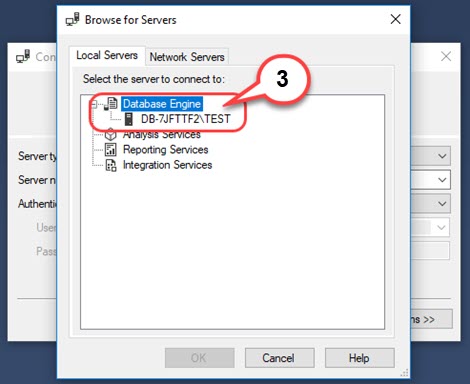
Step 3
Under Database Engine, select the instance you created and select OK.
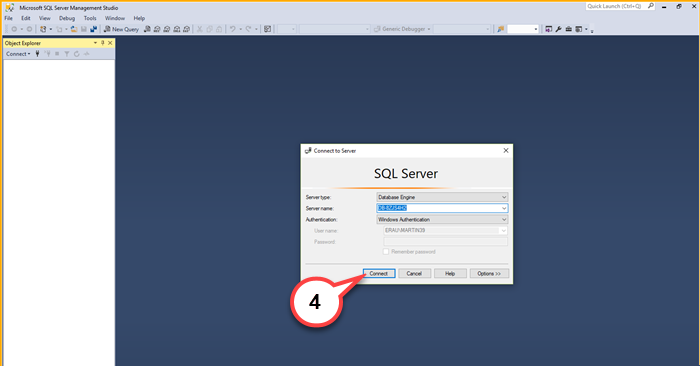
Step 4
Depending on your authentication setup in previous steps, provide any necessary passwords for the instance. Then select Connect.
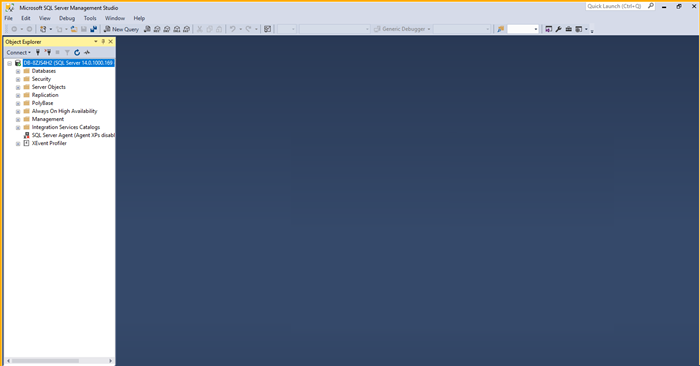
Step 5
Now you are ready to use the Microsoft SQL Server Management Studio.