Lab Environments
JBL offers Cloud Lab Environments that immerse students in a mock IT infrastructure using a cloud computing environment. Cloud Labs reproduce the complex challenges of the real world, which provide an essential tool for mastering key course concepts through experiential training.
Select an option to help you use the Cloud Desktop Environment.
Have a question not answered here? Visit the JBL Tech Support page for more information.
Cloud Desktop
Using the Cloud Desktop allows you access to a virtual machine with real software installed. Follow the steps below to start, save, and stop the lab environment.
Step 1
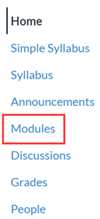
Access the course modules.
Step 2
Select Cloud Desktop under Course Specific Information.
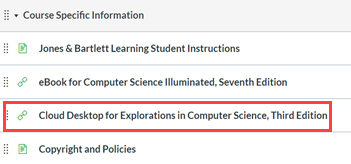
Title of Cloud Desktop will vary by course.
Step 3
Select Load Cloud Desktop in a new window.

Step 4
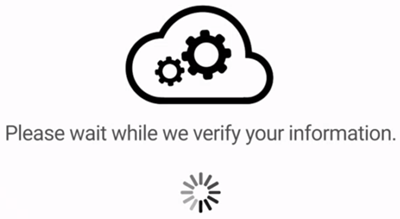
A loading screen will appear. Do not refresh the page.
Step 5
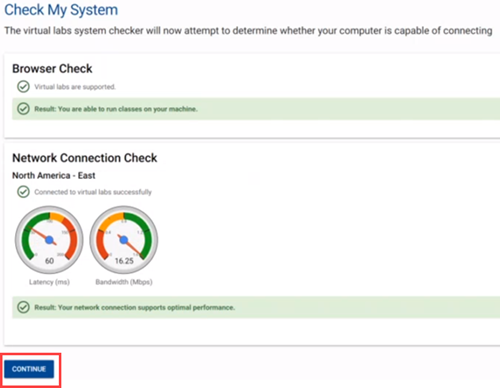
The first time you enter the lab tool, you'll be prompted to check your system's settings. This will determine if your current system is compatible with the website. Select Continue when done.
Step 6
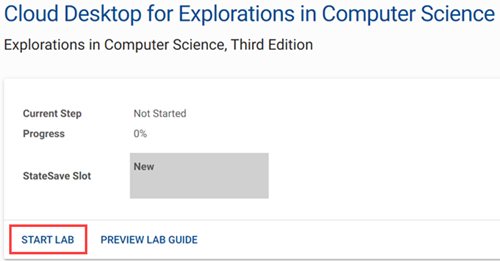
You'll see the desktop with a summary of your current place in the lab. Here, you can start the lab or view the lab guide. Select Start Lab.
Step 7
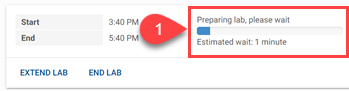
The lab loading screen will appear. It can take several minutes for the lab to prepare to be opened. Do not refresh the page while it loads.
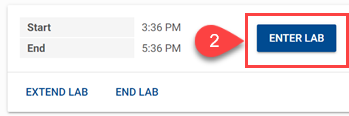
Once it loads, select Enter Lab.
Note: The JBL server designs the lab to be open for 2 hours; the time limit is only for capacity purposes on the server. You can re-enter or extend the lab at any time. You are not limited to just 2 hours.
Step 8
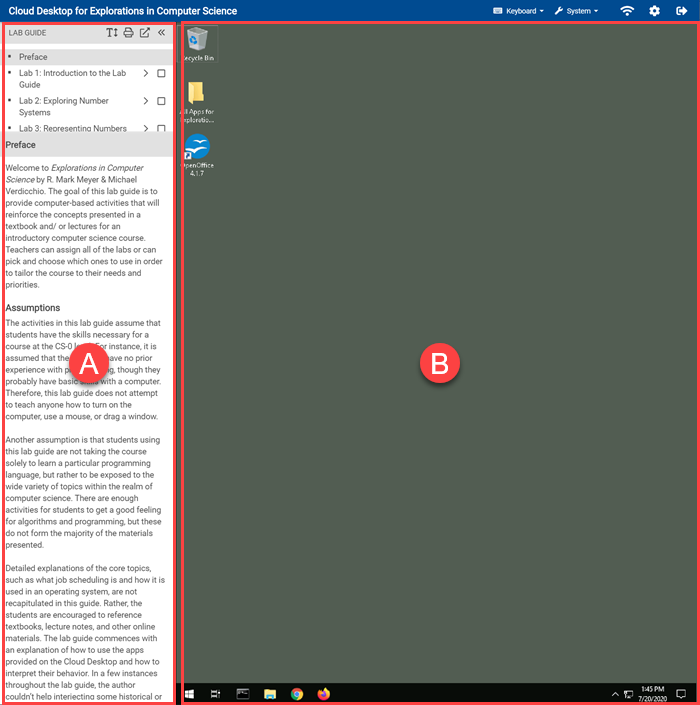
It'll take a moment for the virtual desktop to load. You'll see the following:
- Lab Guide: Allows you to navigate the lab instructions, including the activities and exercises available per lab. Refer to your course for specific labs you'll be doing.
- Desktop: A virtual desktop on a virtual machine. You can do most functions available on a Windows desktop computer. You'll use this to complete lab activities and exercises.
Access Activities and Exercises in the Lab
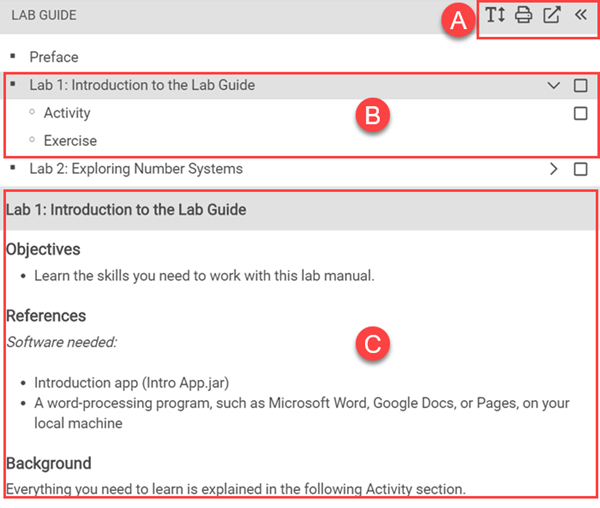
In the Lab Guide, you'll be able to access the following:
- Controls:
- : Change the size of the font
- : Print the guide
- : Expand the guide to a new window
- : Hide the guide
- Lab Activities and Exercises: Check your course to be sure you do the right activity or exercise.
- Objective, References, and Background: When you select the lab, you can see an overview page that includes these components. Pay close attention to the required software.
Create a StateSave and End the Lab
Creating a StateSave of the Cloud Desktop will preserve changes committed to disk during the lab, but will not keep open windows or other active processes.
Depending on your needs, you'll either save during the session or save by ending the lab. Choose the appropriate steps below.
Step 1 (during session)
Select System if you want to save during a session.

Step 2 (during session)
In the dropdown, select Overwrite StateSave. Additionally, if you ever need to revert to a previous or the initial StateSave, you can select those options here. It may take a few minutes for the StateSave to complete.

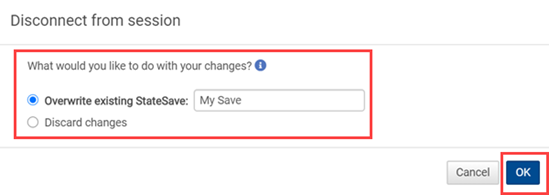
Step 1 (ending lab)
Select if you want to save and end the lab.

Step 2 (ending lab)
Before signing out, you'll be prompted to either overwrite the existing StateSave or discard changes. Then select OK. It make take several minutes to save.
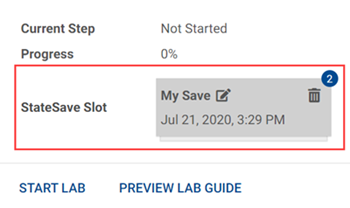
Dashboard After StateSave
The StateSave Slot will display your save. Previous saves are hidden behind it. You can't access previous states without reopening the lab and reverting back to a state.