Getting Started
Microsoft Visio is only available on Windows operating systems. Windows users should use the steps in the menu to get started.
Note: Microsoft Visio is a .exe software that requires administrative access to install. If you do not have admin access on your device or cannot access a device with admin access, contact your instructor.
Guidance for Mac Users
Mac users will need to complete additional steps before installing Microsoft Visio because it is only Windows compatible. Free virtualization options are provided and all students can install Windows 10 or 11 for free as well.
Note: If you have already installed a virtualization option and the Windows 10 or 11 operating systems on your Mac, you can skip these steps and start with downloading and installing Microsoft Visio.
- Install a Virtualization Tool: Install a virtualization tool on your Mac device to mimic a Windows environment. Virtualization partitions your device's hard drive, allowing you to have multiple virtual environments on your Mac; doing this will let you run Windows 10 or 11 and Windows only softwares. A list of recommended virtualization options are available on the ERAU Worldwide Computer Requirements: Mac Users page.
- Install Windows 10 or 11 OS: Open the virtualized environment and install the Windows 10 operating system. Windows 10 or 11 is free to download from the ERAU WebStore. To find more information on downloading and installing Windows 10 or 11, visit the ERAU Worldwide Computer Requirements: Mac Users page.
- Download and Install Microsoft Visio: Once you have a Windows environment on your Mac device, complete the steps in the menu to download and install Microsoft Visio.
If you follow the instructions and are still not able to download or install the software, visit the Support page.
Download Microsoft Visio
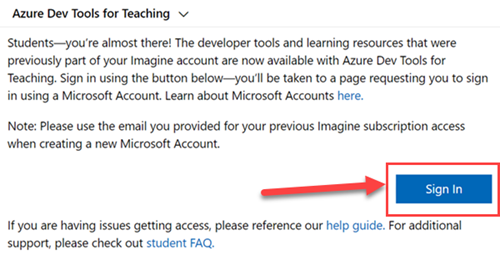
The Microsoft Visio software is included with the university's Microsoft licensing, but needs to be downloaded separate from other Office 365 products. Follow the instructions below to download Microsoft Visio.
Note: Microsoft Visio is a .exe software that requires administrative access to install. If you do not have admin access on your device or cannot access a device with admin access, contact your instructor.
Step 2
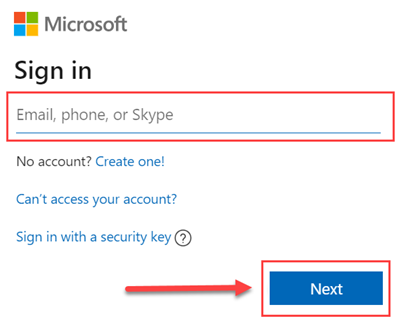
If prompted, enter your ERAU email address, then select Next.
Note: You may also be prompted to sign into ERNIE.
Step 3
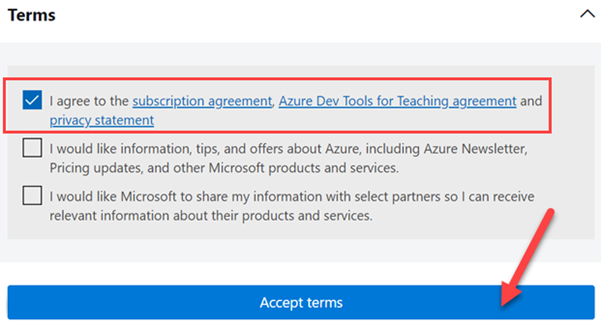
Agree to the Terms by selecting the checkbox and select Accept terms.
Step 4
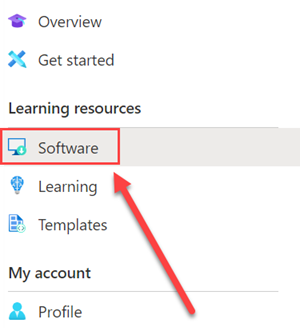
Select Software from the Learning resources menu.
Step 5
- Type Visio into the search bar.
- Locate and select Visio Professional 2019. A side panel fly-out will appear.

Step 6
Select Download in the fly-out to download the executable file.
Note: Some users may see a General URL button instead. If so, select it, then copy and paste the URL in your browser to download the executable.

Step 7
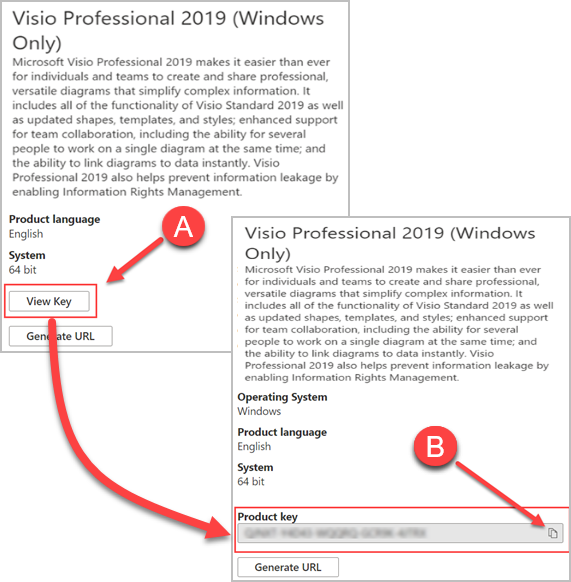
To install the software, you will need the product key. In the fly-out side panel for downloading the program:
- Select View Key
- Copy () the Product key - save this number for later, as you'll need it to install the software
You're now ready to install Microsoft Visio! Visit the 2. Install section on this page to continue.
Install Microsoft Visio
Follow the instructions below to install Microsoft Visio.
Note: Microsoft Visio is a .exe software that requires administrative access to install. If you do not have admin access on your device or cannot access a device with admin access, contact your instructor.
Step 1
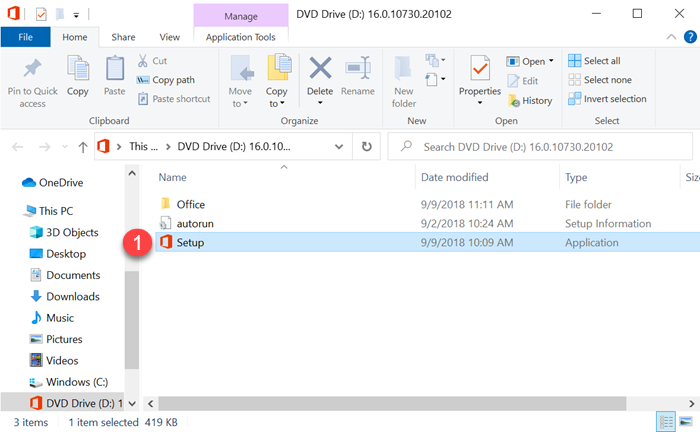
Open the downloaded .iso drive file. This is equivalent to having a physical CD copy of the software.
Step 2
Select the Setup.exe file. The installation will automatically begin.
Step 3
Follow the prompts in the install window. Once Microsoft Visio is installed, open the software.
Step 4
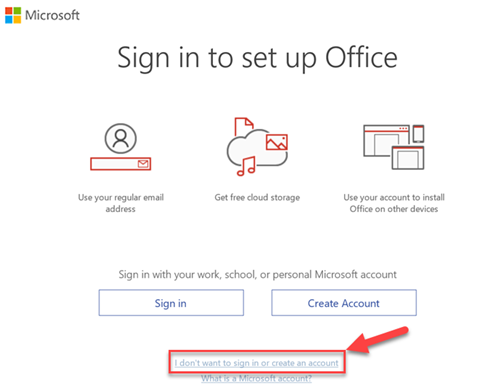
In the sign in screen, select I don't want to sign in or create an account.
Step 5
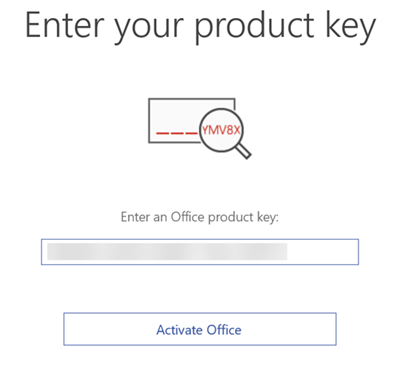
Paste the product key (copied from the Download section) and select Activate Office.
