Using Teams
The purpose of this page is to help you identify the available tools within Teams and to provide guidance for course specific tasks. Select an option from the menu to learn more.
Have a question not answered in this guide? Visit the Technical Support page for support contacts.
Overview of Teams Navigation
Below is the the menu bar in Teams.

- Activity: Recent activity from other team members.
- Chat: Contact other people with an ERAU email (student, faculty, and staff!).
- Teams: Stay in contact with your groups.
- Assignments: View what a professor has posted; this may not be active if your instructor does not utilize this feature.
- Calendar: View your current Teams calendar.
- Calls: Video chat with colleagues.
- Files: View what you have uploaded or downloaded.
View Activity Notifications
By selecting Activity, you'll be able to see recent notifications including chats and reactions.
- Choose between a feed that includes other users and one that includes only your activity.
- View a preview notification of the chat message or reaction.
- When you select a preview, the full conversation will appear larger for you to see - Teams will jump to and highlight the specific message or reaction relevant to the notification.

Starting an Individual Chat
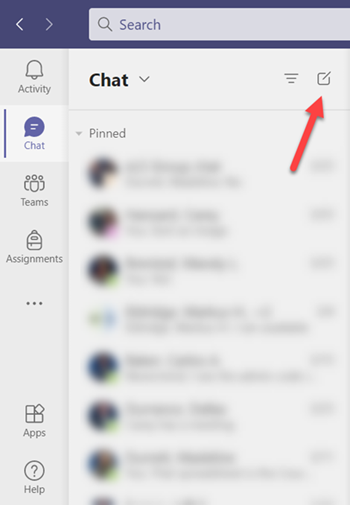
Select Chat.

Search for desired user.
Note: As you type, Microsoft Teams will search the ERAU database for people. It is best to know the exact email address for a user so you don't accidentally include the wrong person!

Select user.

Start chatting.

Starting a Group Chat
There are two ways to utilize Group Chats:
- Create a group chat: This allows you to create a single chat group that you don't intend to use later.
- Create a contact group: Intended to be used if you frequently want to chat with a specific group of people.
Read more about both options below.
Create a Group Chat
Select Chat.
Select the icon. This will open a new chat window.
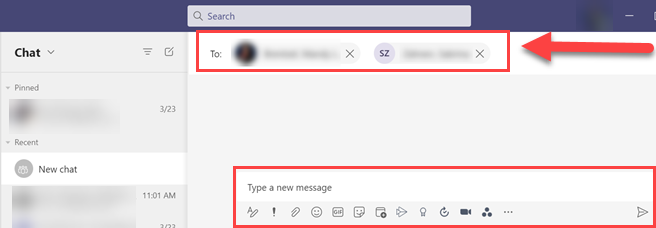
Enter the name(s) of all group members. Once you've added everyone, you can type the first message.
Note: As you type, Microsoft Teams will search the ERAU database for people. It is best to know the exact email address for a user so you don't accidentally include the wrong person!
Create a Contact Group
Select Create a new contact group to create a chat grouping. Be sure you are looking at Contacts, instead of recent chats.

Type the name of the group then select Create.

Locate the newly created group on your contacts list. Select the icon beside the group to add group members.

Select Add a contact to this group.

Type the name of the desired user. Select Add.

You can now open a new chat and instead of searching for a specific person, you can choose the group.
Team(s)
A team within Microsoft Teams represents a space for a team of people to collaborate. It allows the team to share files, add connecting apps, connect to SharePoint, and much more. There are several benefits to using the team tool in Microsoft Teams and it's functionality is complex. The purpose of this section is to help users create a team.
For an in depth explanation of teams, review Microsoft's Overview of teams and channels in Microsoft Teams.
How to Create a Team
Select Teams.

Select Join or Create Team.

Select Create Team.

Select Other.

Fill out Team name, Description, and Privacy.

Select Next.

Search and add users.

Your Team has been created! Visit Microsoft's Teams and Channels article for tips and guidance for utilizing Teams within Microsoft Teams.
Calendar
If you utilize Microsoft Outlook, your Teams calendar will sync with your Outlook calendar and vice versa! Events created or invites accepted in one platform will appear in the other.
Below are steps to creating calendar events in Teams.
Select Calendar.

View by Day, Work Week, or Week.

Select the time block to create new meeting/event.

Enter the following information for your event.
- Title: Label the meeting.
- Location: Select a location.
- Start: Select the start date.
- End: Select the end date.
- Details: Insert the description of the meeting.
- Team: Select the Team channel to meet in.
- Invite: Search and select users to invite to the meeting.
- Select Schedule.

Calls
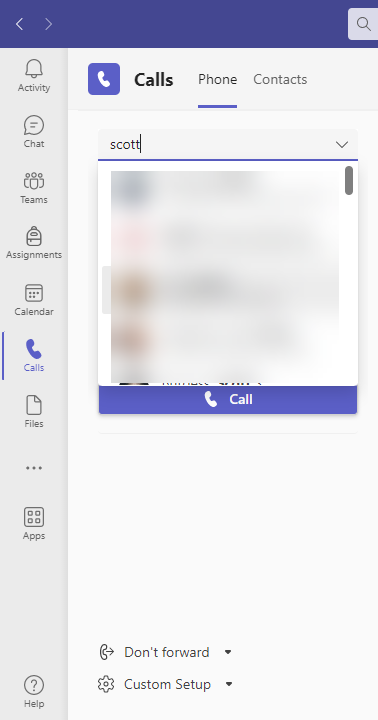
Select Calls.

You'll see the screen. Here you can view your recent contacts and call history as well as access your voicemails, speed dial and other contacts.

To call a specific user, you can type their name in the search bar or find them in your contacts list.


Search and select desired user; you'll see a list of suggested contacts as well.
Once you've selected a user, you can simply hit the call button and the call will start.
How to Access Files
Select Files.

You'll see the following options in the File area:
- Recent: Most recent list of files within all of your Teams uploaded by anyone.
- Microsoft Teams: List of personal files uploaded with Teams.
- Downloads: List of downloaded files from Teams.
- OneDrive: List of files saved from the user's personal OneDrive.

Sharing Files Within Teams
There are two areas within Teams to share files.
- Share a File in a Chat: Sharing a file in a chat will make the file only available to those chat members and only within the specific chat.
- Share a File in a Team: Sharing a file in a Team will make it available to all team members and the file is accessible in SharePoint folder structures. This is meant for more permanent file sharing.
Share a File in a Chat
Select Chat.
You can either select Files or select the icon to upload/attach a file.
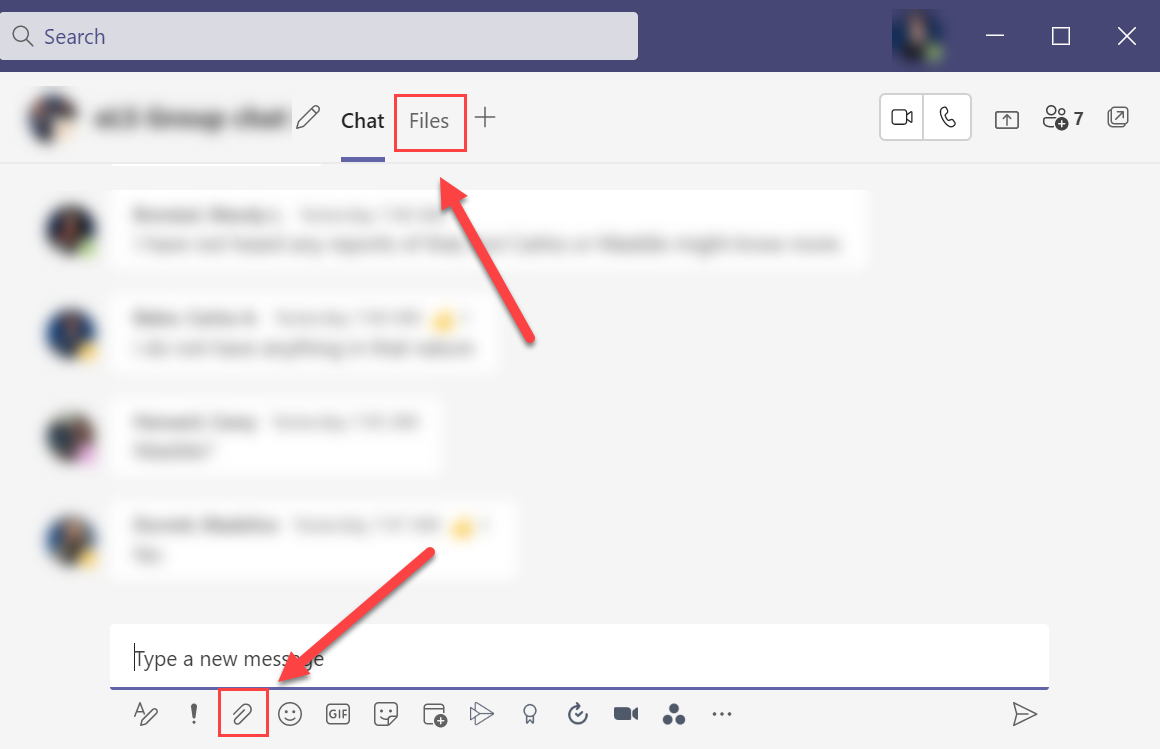
If you choose File, you'll need to complete the following to upload:
- Select Share.
- Select Upload from my computer to select the local file you want to upload.

Share a File in a Team
Select Teams.
Select the desired channel to upload a file.

Select Files. Then choose the appropriate uploading file option.

Recording
All Teams meetings or calls can be recorded. The directions below will help you start, stop, view, and share a recording.
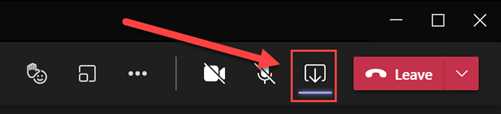
Begin Recording
- Select the ellipsis .
- Select Start recording.
It may take a few seconds for the recording to begin.
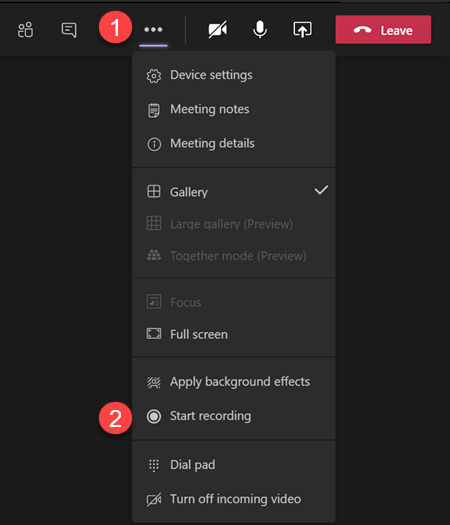
Once the recording has begun, a banner will appear.

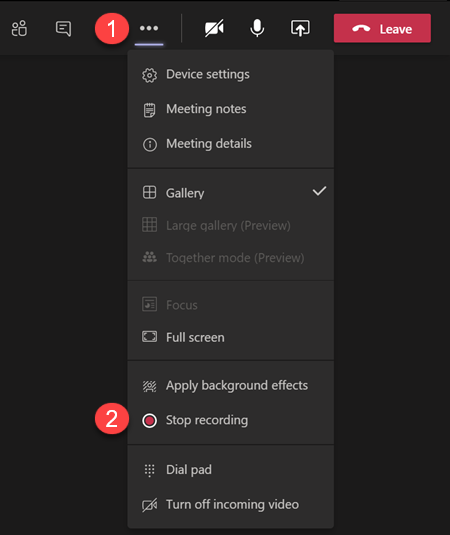
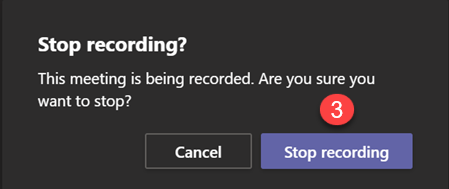
Stop Recording
- Select the ellipsis .
- Select Stop recording.
- Confirm in the pop-up dialog box by selecting Stop recording again.
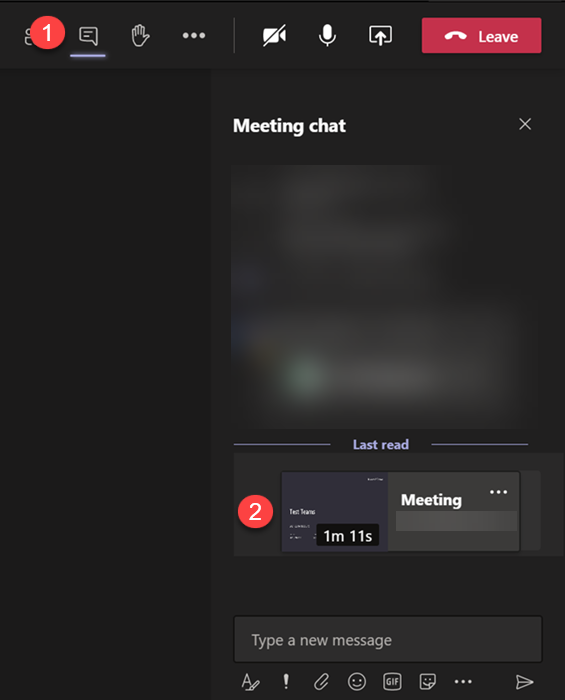
View Recording
Recordings can be viewed either within the chat of the meeting/call, or in Microsoft Stream on the account of the person who started the recording.
For ease of access, most users are advised to utilize the link in the chat of the meeting/call.
- Select the Show conversation button .
- The recording will appear as the last message.
It may take a few minutes for the recording to appear depending on the length and size of the recording.
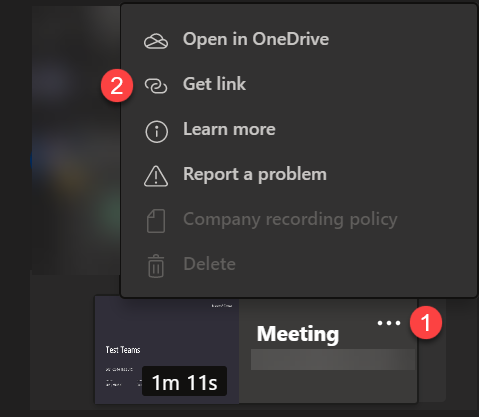
Share Recording
- Select the ellipsis in the recording in the conversation.
- Select Get link.
- A pop-up dialog box will appear with the link that you may share.

Whiteboard
The Whiteboard Tool is a useful collaborative tool. To use this tool, you must be in a meeting (not a call) set up via the Calendar Tool.
Note: When recording a Microsoft Teams meeting, the Whiteboard will not record as part of the session. To turn in your work, you will need to upload the Whiteboard separate from the meeting recording.
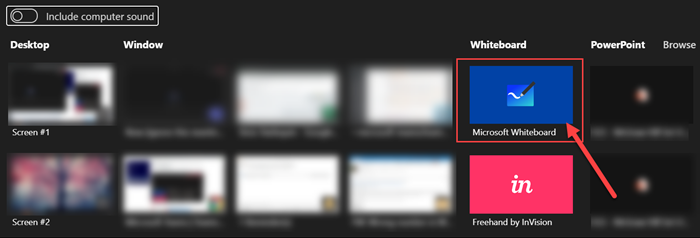
How to Open Whiteboard Tool
Select Share content icon.
Select Microsoft Whiteboard.
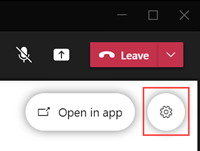
A dialog box will appear asking if you want to Present Whiteboard (only you can edit) or if you want to Collaborate on Whiteboard (everyone can edit).
This selection can be changed at anytime by selecting the to open the Settings menu.

Exporting Whiteboard
Once you are finished, you may export your Whiteboard as a PNG file by selecting the to open the Settings menu.
Select Export image (PNG).

MKTG 512 Students
Students enrolled in MKTG 512 are required to conduct collaborative calls on Microsoft Teams. This includes utilizing the whiteboard for brainstorming and recording the meeting. Meeting recording(s) and whiteboard export image(s) will need to be submitted thoruhgout the course.
The purpose of this page is to help MKTG 512 students identify the areas of the guide that pertain to their course. For specific guidance about assignments that utilize Microsoft Teams, visit the Canvas course or reach out to your instructor.
MKTG 512 Students should complete the following steps:
- Create a meeting in Teams with the Calendar tool. Be sure to invite all members of
the collaborative group.
- Before beginning the meeting, someone should be sure to record it.
- During the meeting, utilize the Whiteboard to collaborate.
- Share the Recording and the Whiteboard in a Canvas assignment. Specific directions
for each assignment are in the course.